Free Microphone Plugins: The Secret to Superior Sound in Your Livestreams
Unlock studio-quality sound for your streams. This guide explores free, customizable VST plugins like Noise Gates, EQ, and Compressors to achieve crisp, professional sound quality.
Mastering the art of livestreaming isn’t just about visuals—it’s also about delivering crisp, clear, and engaging audio. In this guide, we’ll explore how you can enhance your livestream’s audio quality using free microphone plugins, ensuring your audience enjoys the best listening experience. We’ll delve into Noise Gates, EQ, Compressors, and De-Essers – essentially everything you need to extract the best sound from your microphone.
Even better, all of these recommended plugins are not only highly customizable to your unique voice but are also entirely free of charge. The plugins we’ll be discussing are VST (Virtual Studio Technology (opens in a new tab)) plugins. These are software plugins designed to replicate the functionality of real studio hardware.
Before we dive in, here are three crucial points to keep in mind:
- You can find download links for every plugin mentioned in this article.
- We’ll be incorporating these plugins into our microphone chain using the Elgato Wave Link software (opens in a new tab). It’s also possible to add VST plugins directly into OBS Studio (opens in a new tab), though currently, OBS does not support VST3 plugins.
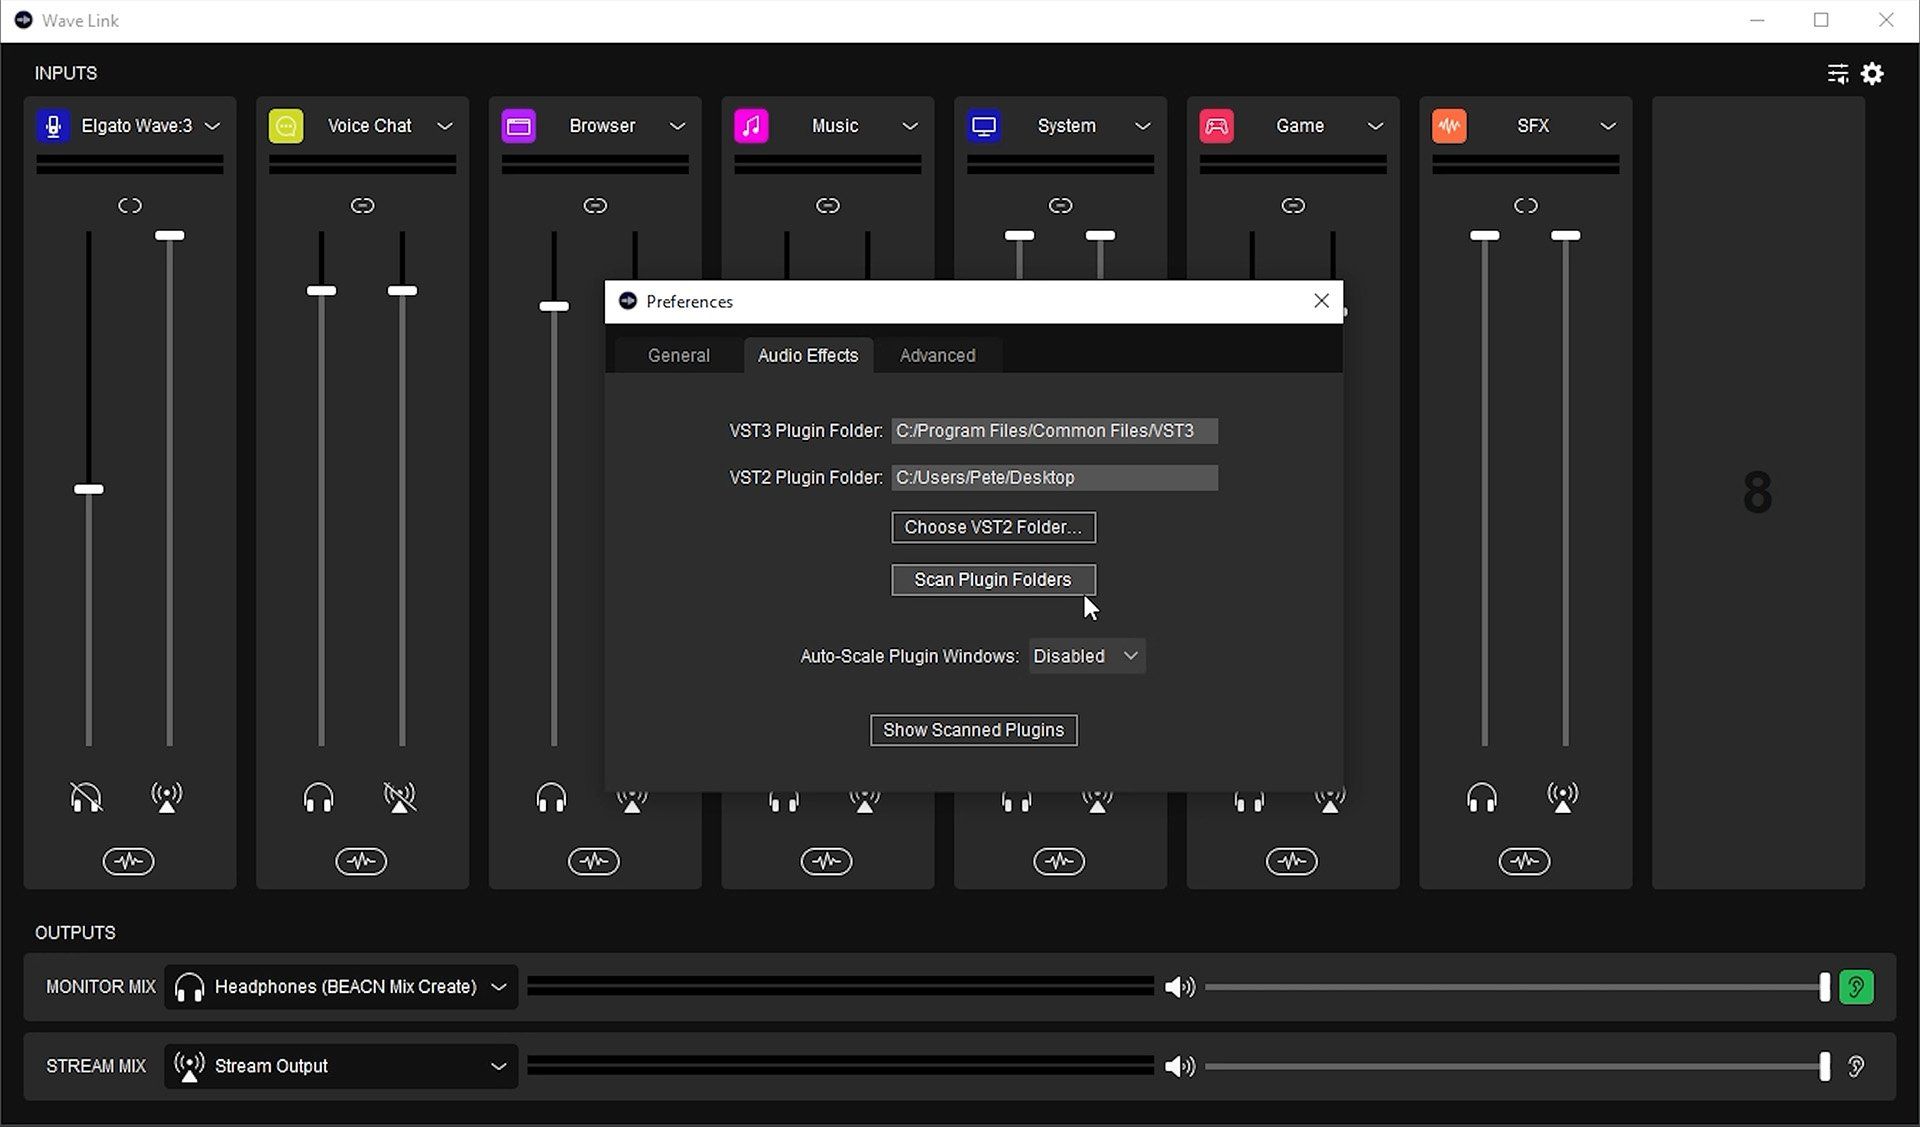
- Following the installation of a VST plugin, Wave Link has to locate it before it can be added to a channel. To accomplish this, simply open the preferences window, navigate to the
Audio Effectstab, and click onScan Plugin Folders. By default, VST3 plugins will install toC:\Program Files\Common Files\VST3\on PC orlibrary/audio/plug-ins/VST3on Mac. Wave Link is already configured to use these folders.
With these points in mind, let’s dive into the world of microphone plugins and explore how they can enhance your livestreaming experience.
Enhancing Your Audio with Noise Gate VST Plugins
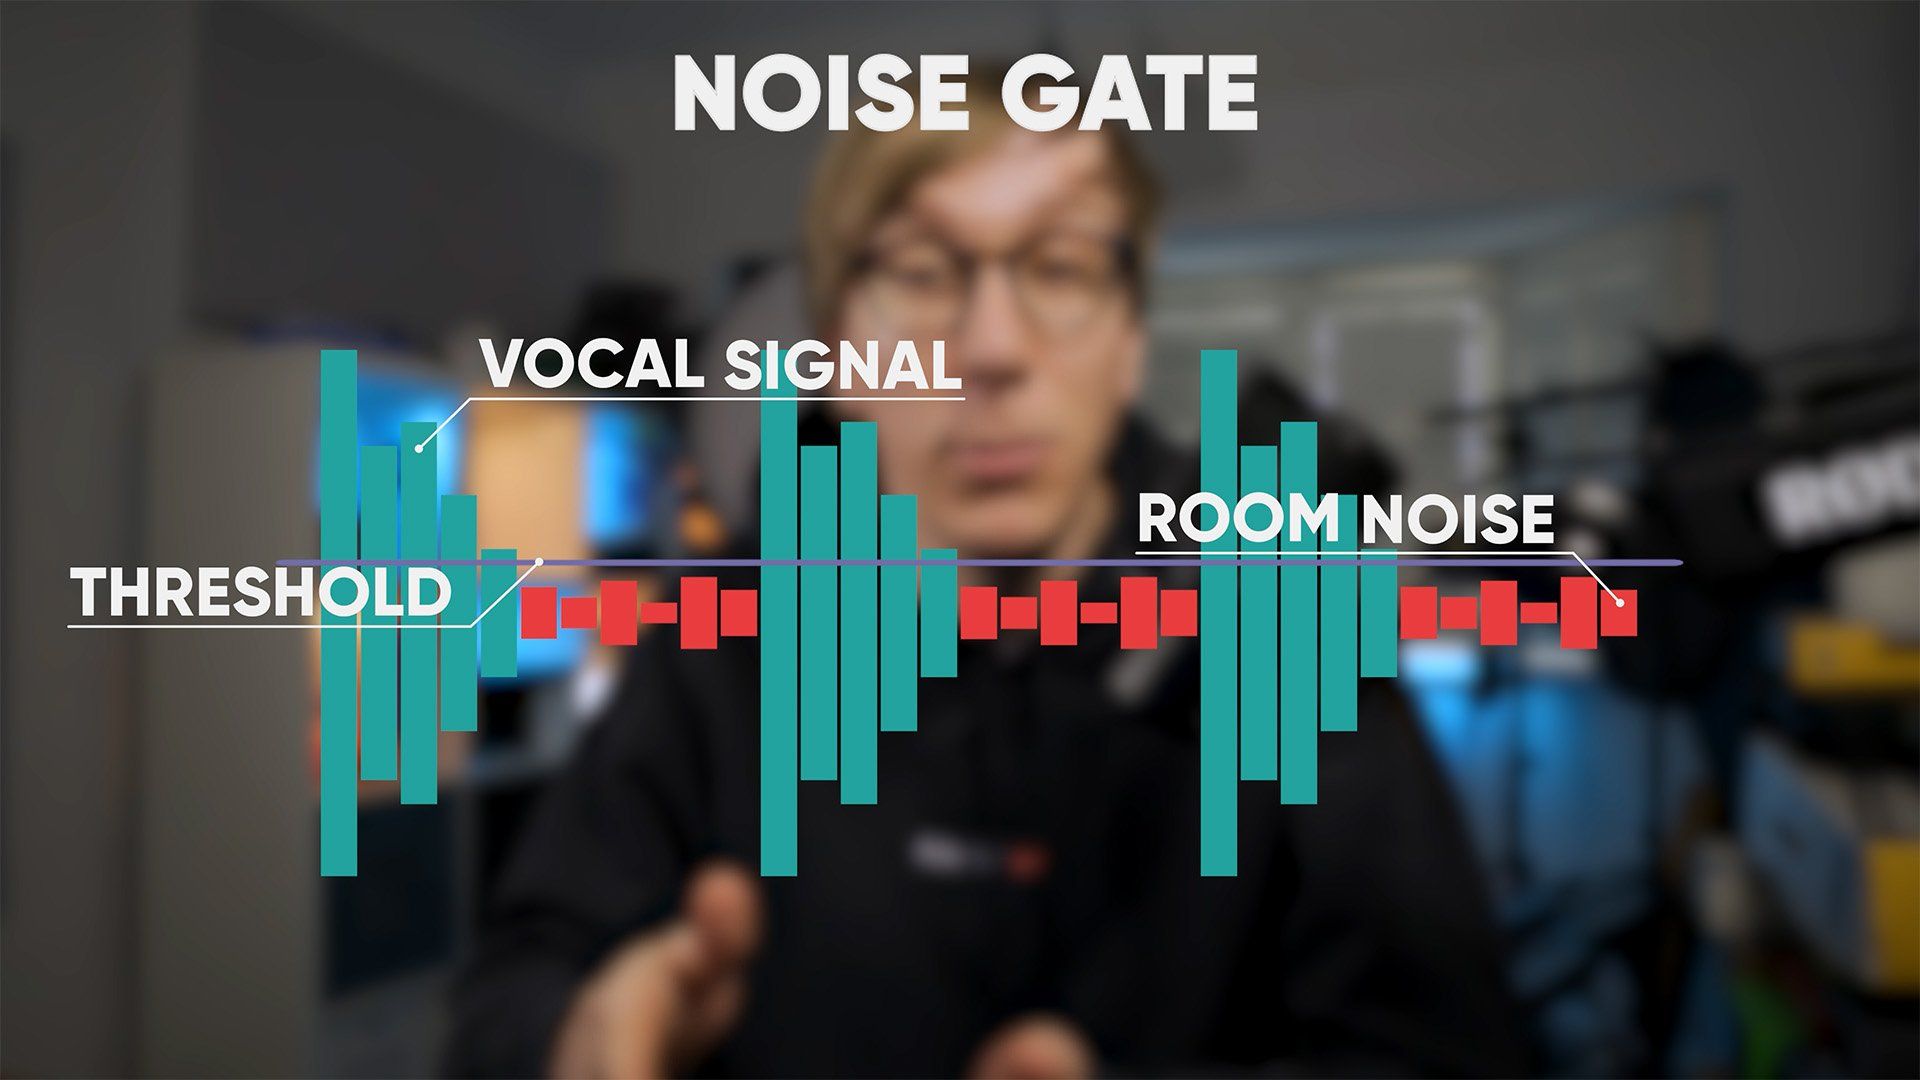
The first step in our journey to superior audio quality is the addition of a Noise Gate VST plugin. This plugin effectively mutes your microphone when you’re not speaking, thus eliminating any background noise from infiltrating your audio stream. As soon as you start speaking again, the noise gate ‘opens’, and your microphone is unmuted.
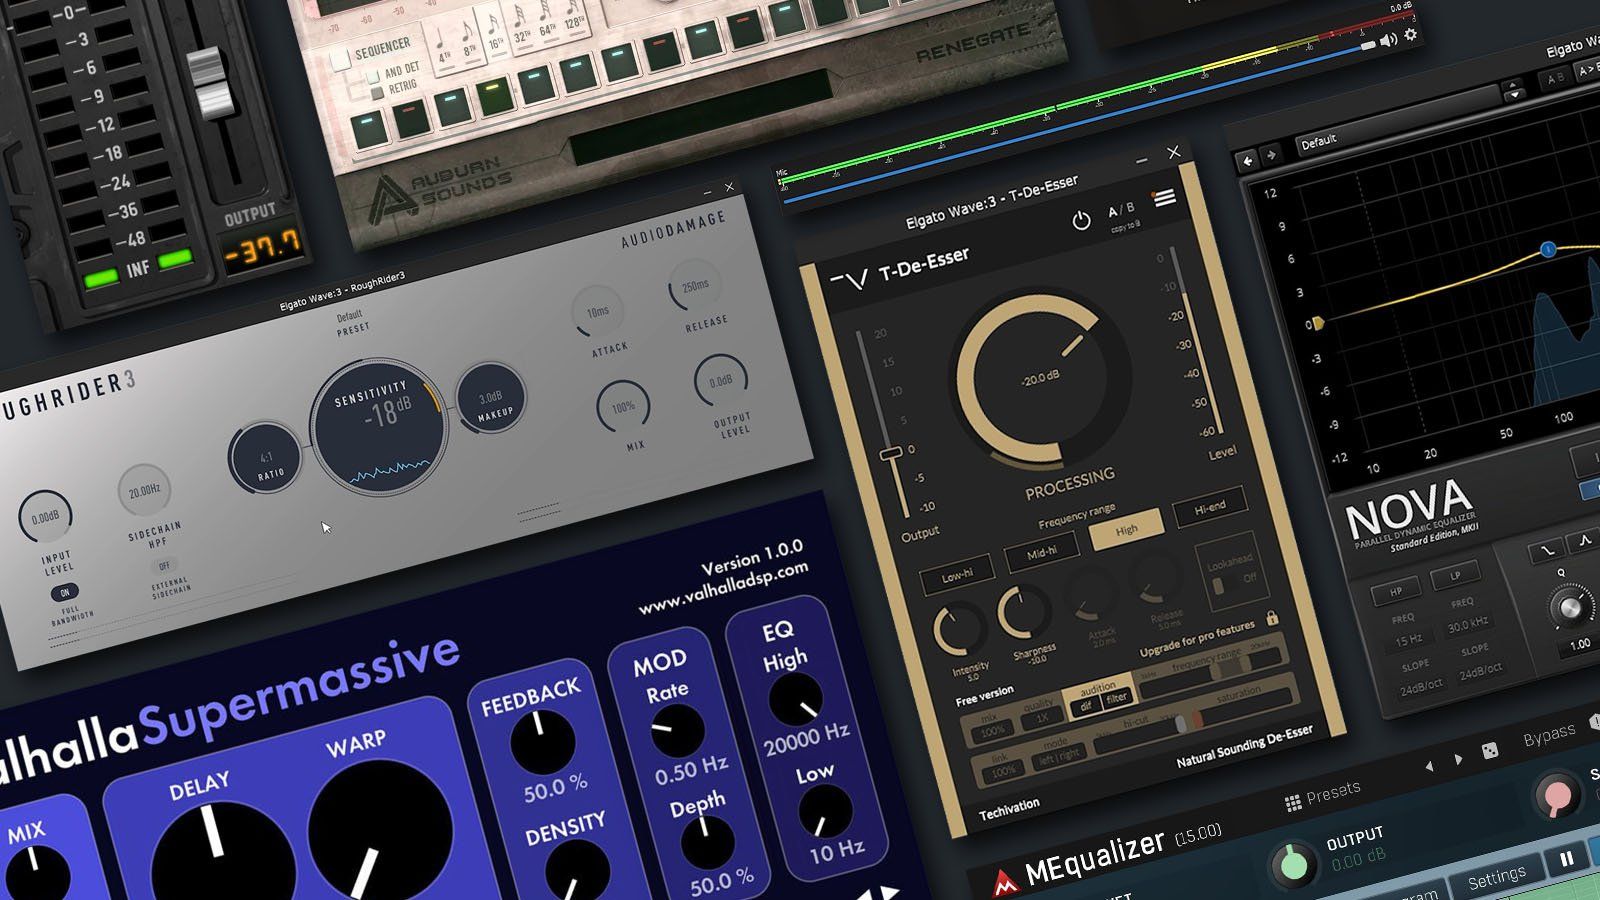
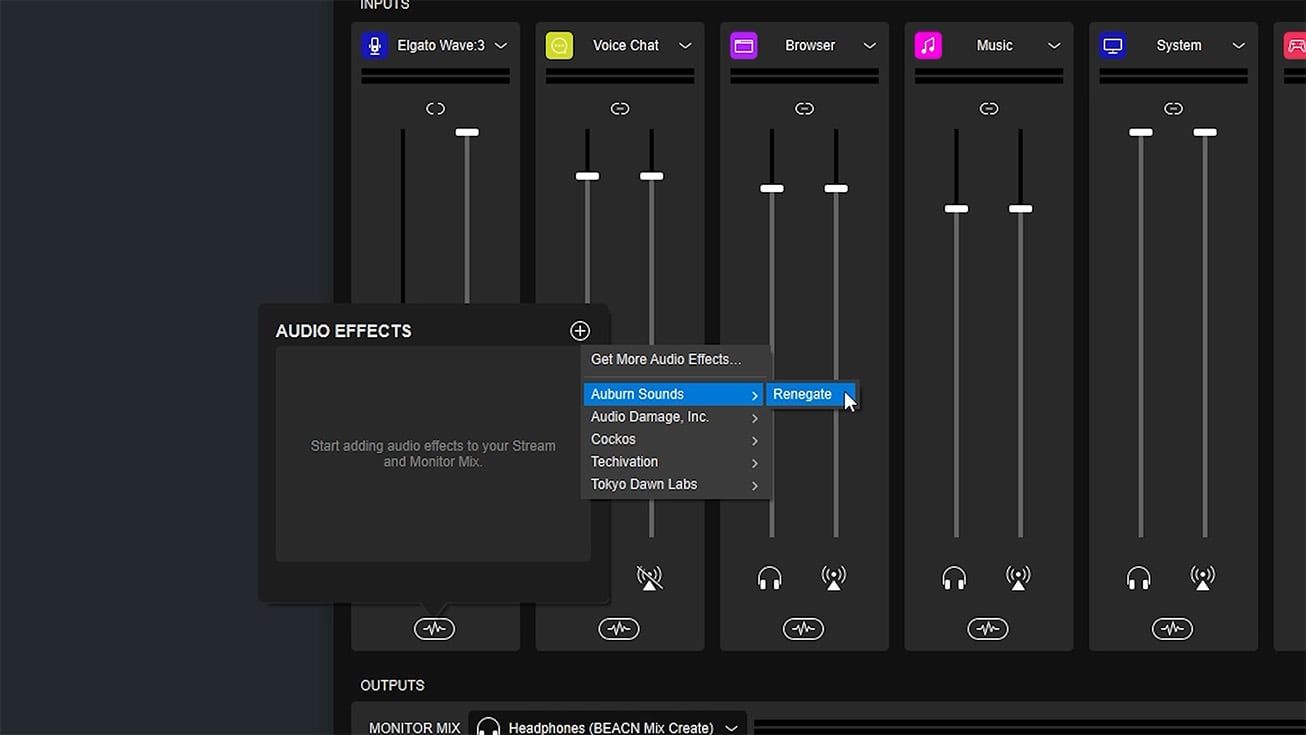
One of the best free noise gate plugins available is Renegate (opens in a new tab), which offers a visually intuitive interface to help you understand the exact settings being applied. Download Renegate from their website (opens in a new tab), install it on your PC, and ensure Wave Link scans the folder where it’s installed. Once done, you can locate the effect by clicking on the Effects button on your microphone channel and selecting Renegate from the list.
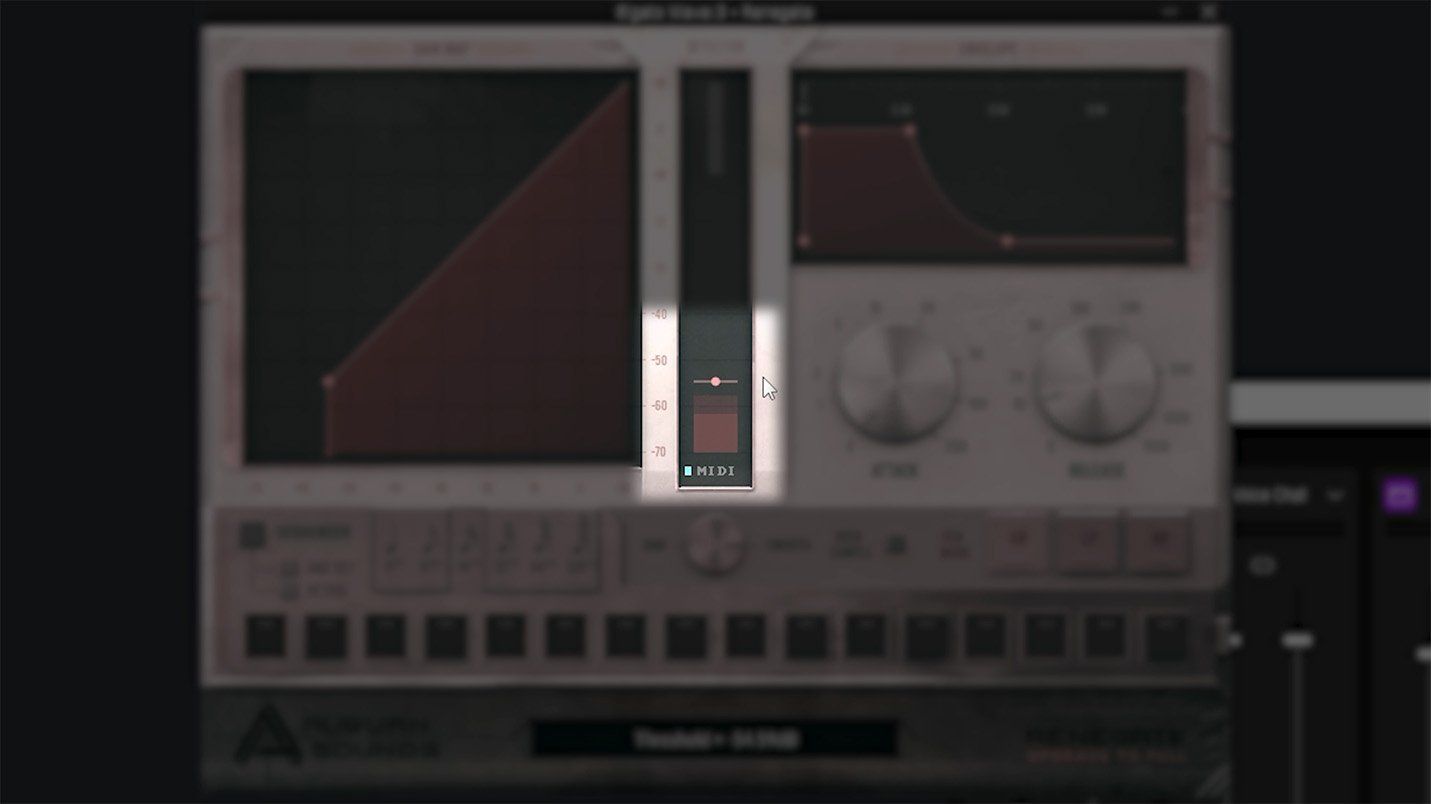
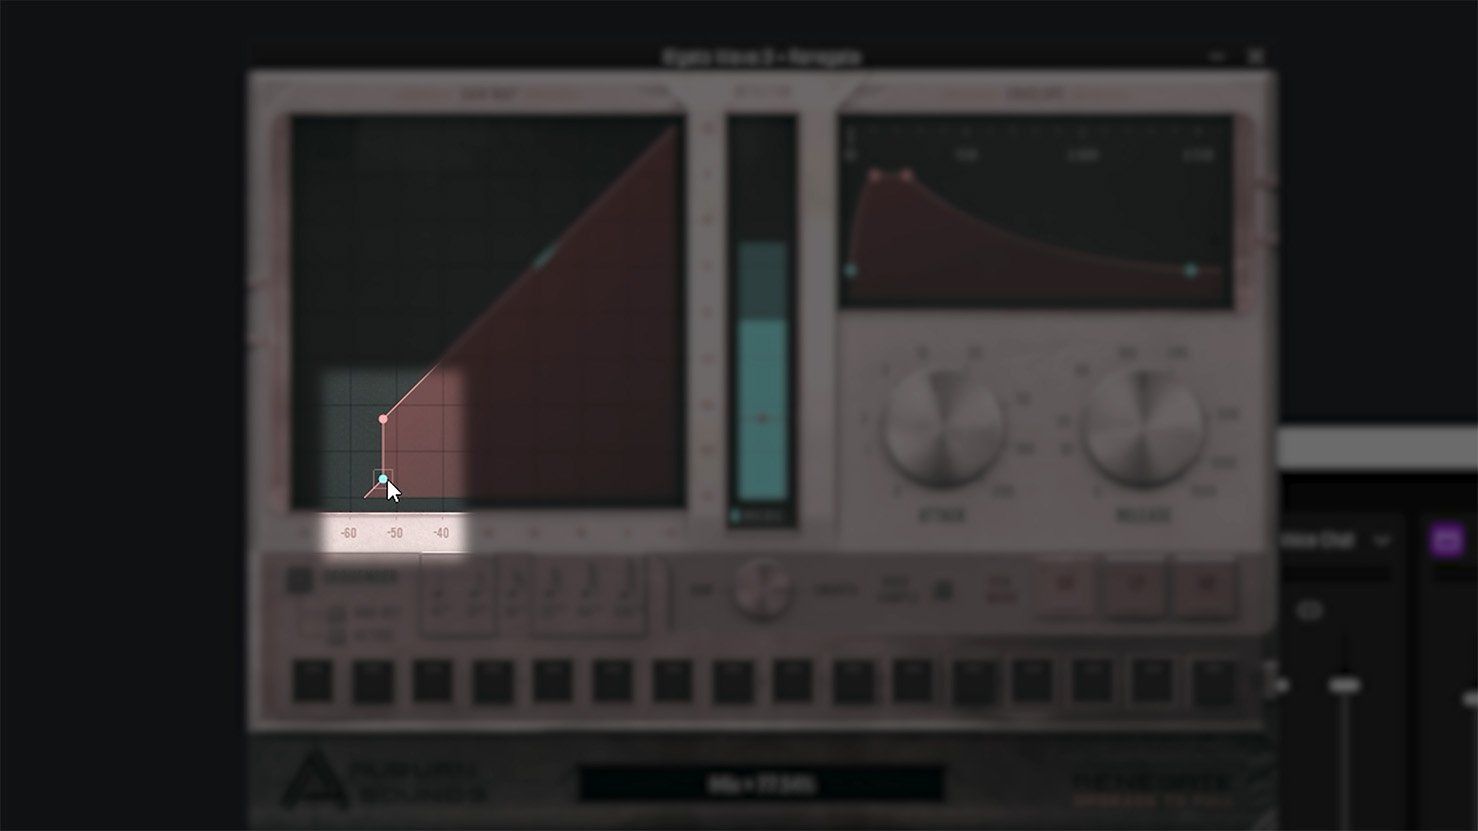
The first step in setting up Renegate is establishing your noise floor, a task unique to each user as it depends on the environment where your streaming PC is located. To do this, remain silent and observe the levels your microphone picks up without your voice input. If, for instance, your noise level hovers around -60 decibels, set your threshold roughly 5 decibels above that level (around -55 decibels). This means that when your volume is above this threshold (i.e. when you’re speaking), the noise gate will be open. Conversely, when the volume falls below this threshold (when you’re silent), the gate will close, preventing any room noise from entering your audio stream.
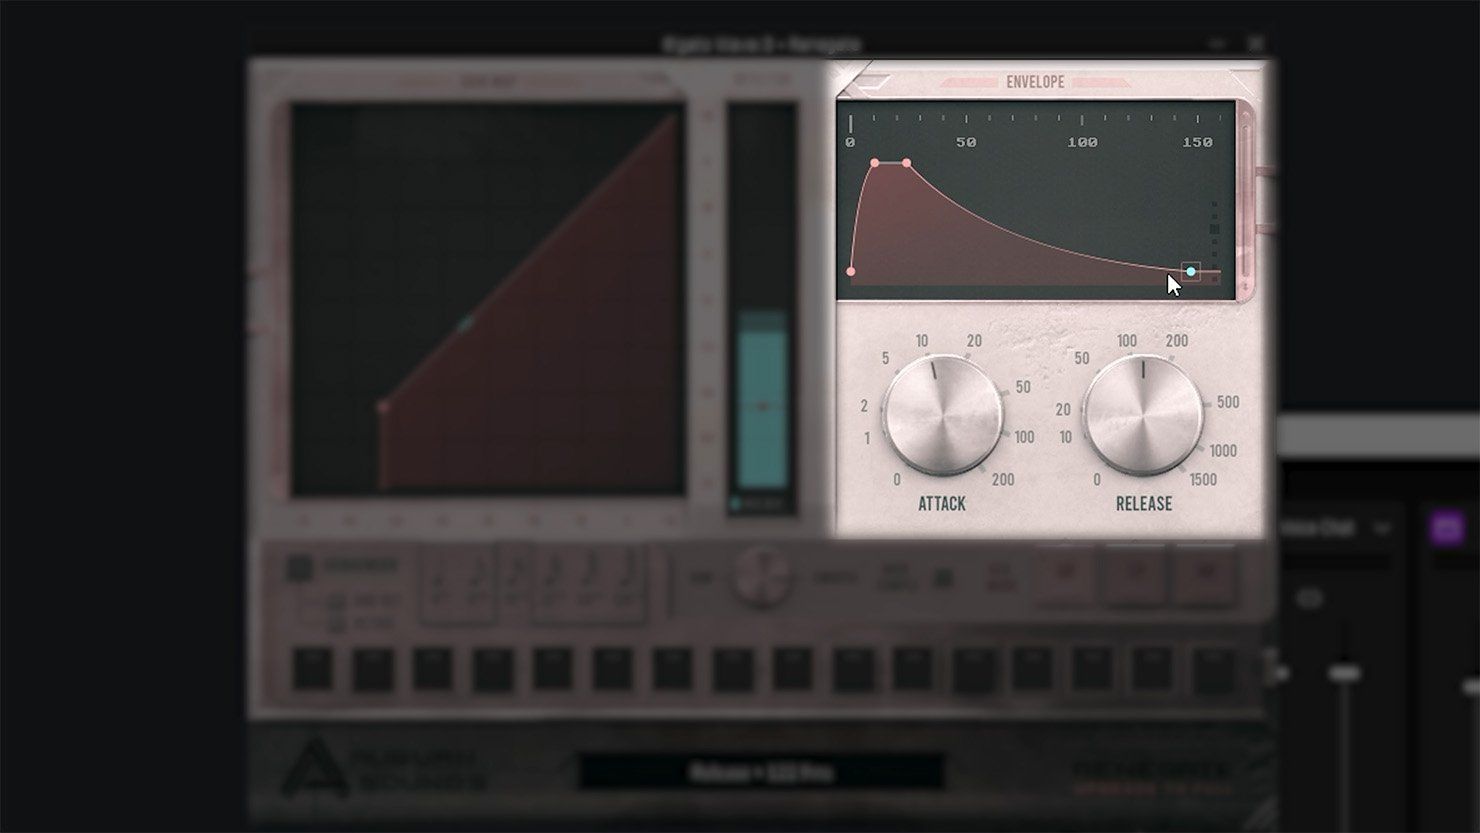
Renegate also allows you to adjust the attack and release times, essentially controlling how quickly the gate opens, how long it stays open, and how slowly it closes again. The default settings may seem a bit quick, so consider setting your attack to around 10 milliseconds and your release to approximately 125 milliseconds for better results.
The final tweakable setting in Renegate is the mix percentage, which controls how closed the gate is when it’s not in use. Dragging this setting to the bottom (100%) ensures the gate is fully closed, allowing no noise when you’re silent. However, for a more natural sound, consider setting this to around 80 to 85%, which allows a small amount of room noise but maintains a more natural audio flow.
Fine-Tuning Your Audio with EQ Plugins
The next step in our audio enhancement journey involves adding some EQ (Equalization) to our microphone chain. EQ settings are inherently subjective, as they depend on factors such as your unique voice, the microphone you’re using, and the environment from which you’re streaming or recording. Even if two people were using the same microphone in the same setting, their EQ profiles would differ due to the unique qualities of their voices.
While it’s challenging to recommend a one-size-fits-all EQ setting, there are some subtle changes you can use as a starting point. However, it’s crucial to listen to how these changes affect your voice and make necessary adjustments based on your personal preferences.
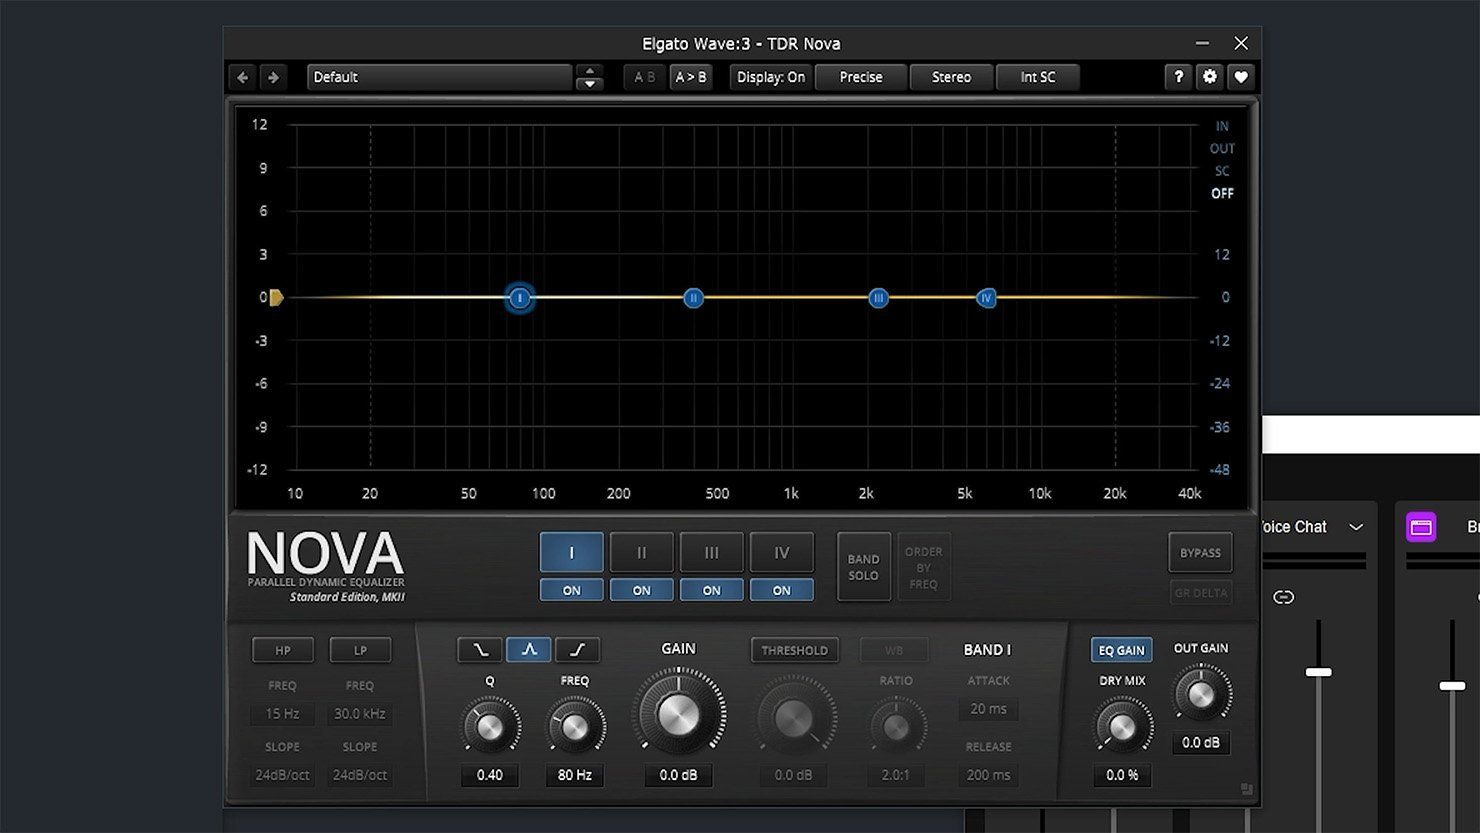
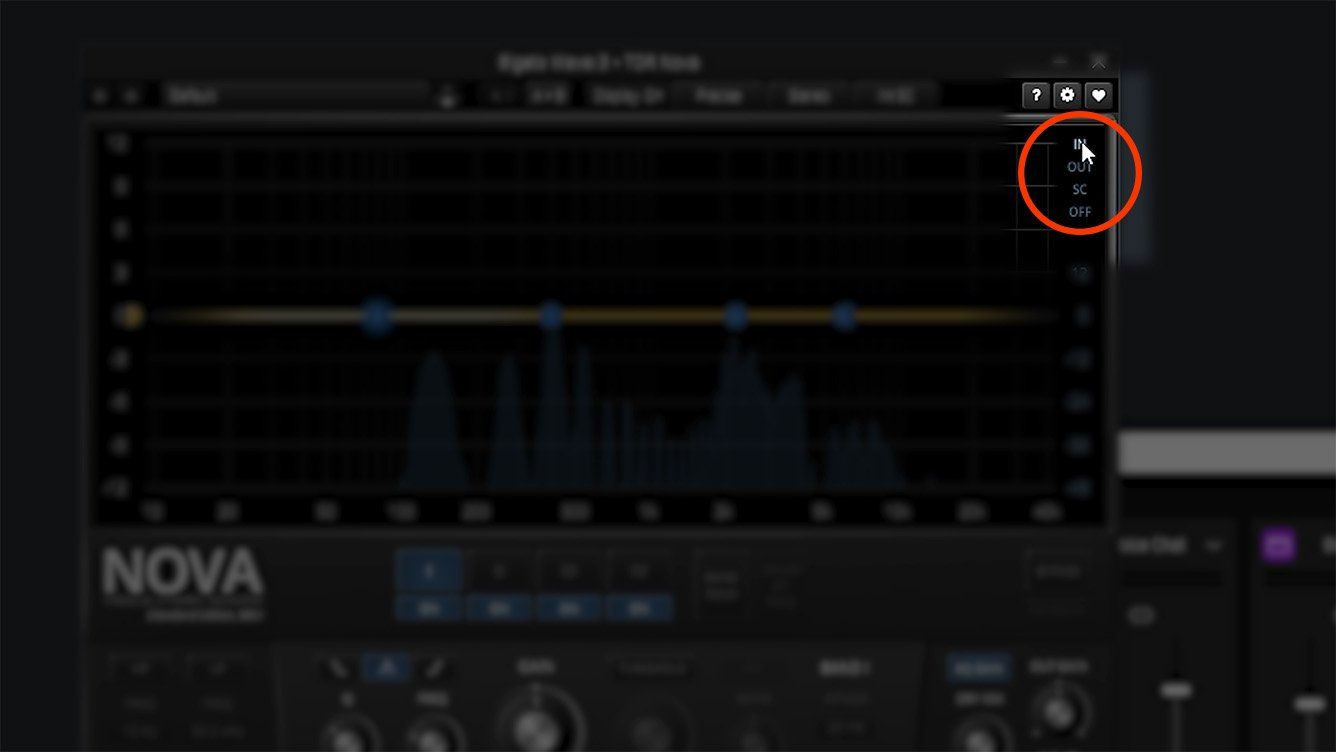
TDR Nova (opens in a new tab) is an excellent free EQ plugin that can help you in this process. After downloading, installing, and scanning it within Wave Link, you can add it to your microphone chain. Once opened, you’ll need to switch the setting from Off to In to see the frequency response of your voice.
We’ll apply a basic three-band EQ to our voice. You can disable the fourth band as we won’t be using it. Adjustments can be made either on the graph by dragging the nodes around or by modifying the Q, frequency, and gain values using the knobs at the bottom.
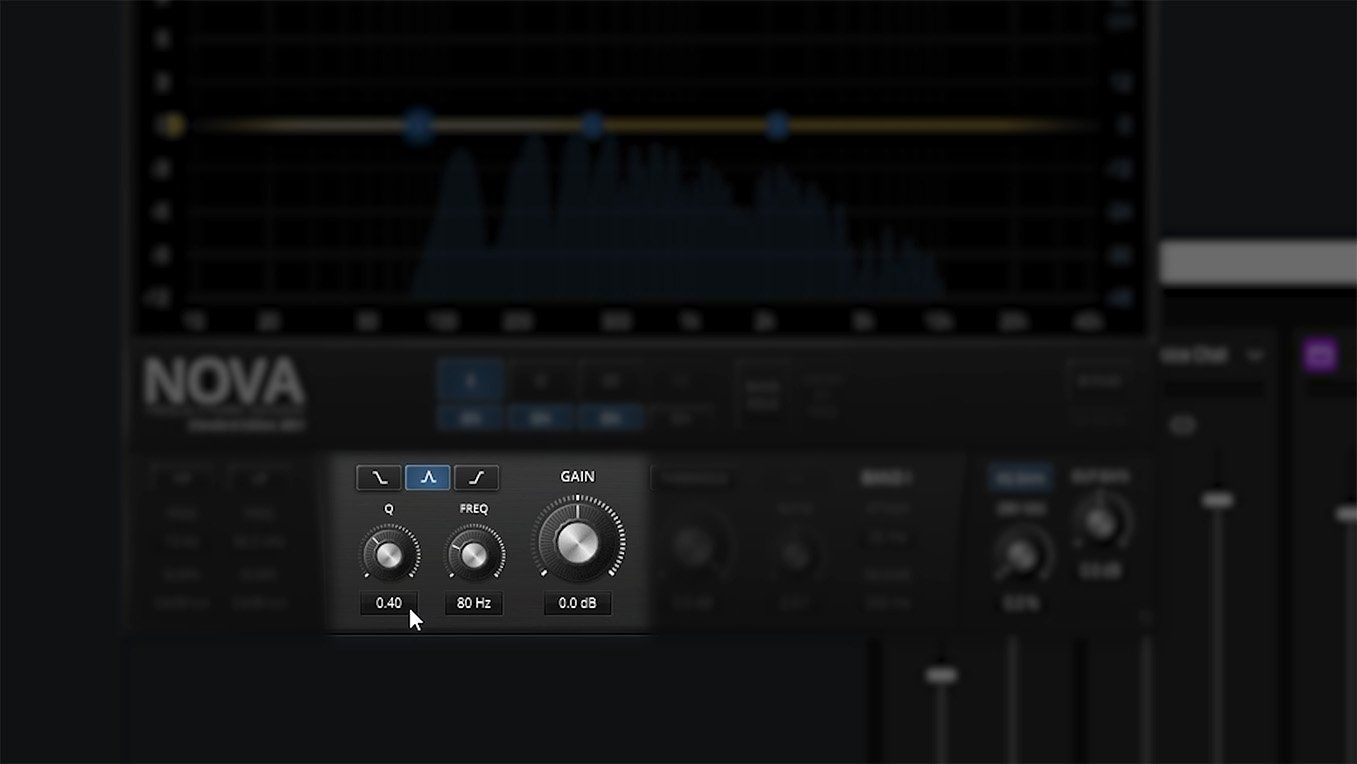
Here are some suggestions for your EQ settings:
- First Node (Warmth): Add a slight
boostin the100to150 Hertzrange to add some warmth to the low end. For instance, you might choose a 1-decibel boost of around 140 Hertz and adjust the Q to around 0.9 for a wider bandwidth. - Second Node (Reducing Boxiness): Make a slight
cutin the400to900 Hertzrange, typically responsible for a ‘boxy’ sound in most voices. A cut around 1.5 decibels at 500 Hertz, with a narrower Q width, could work well. - Third Node (Clarity): Add a
shelfstarting in the3,000to5,000 Hertzrange to enhance clarity. You might choose to start around 4,000 Hertz and add a slight gain of around 0.8 decibels, adjusting the Q value to around one.
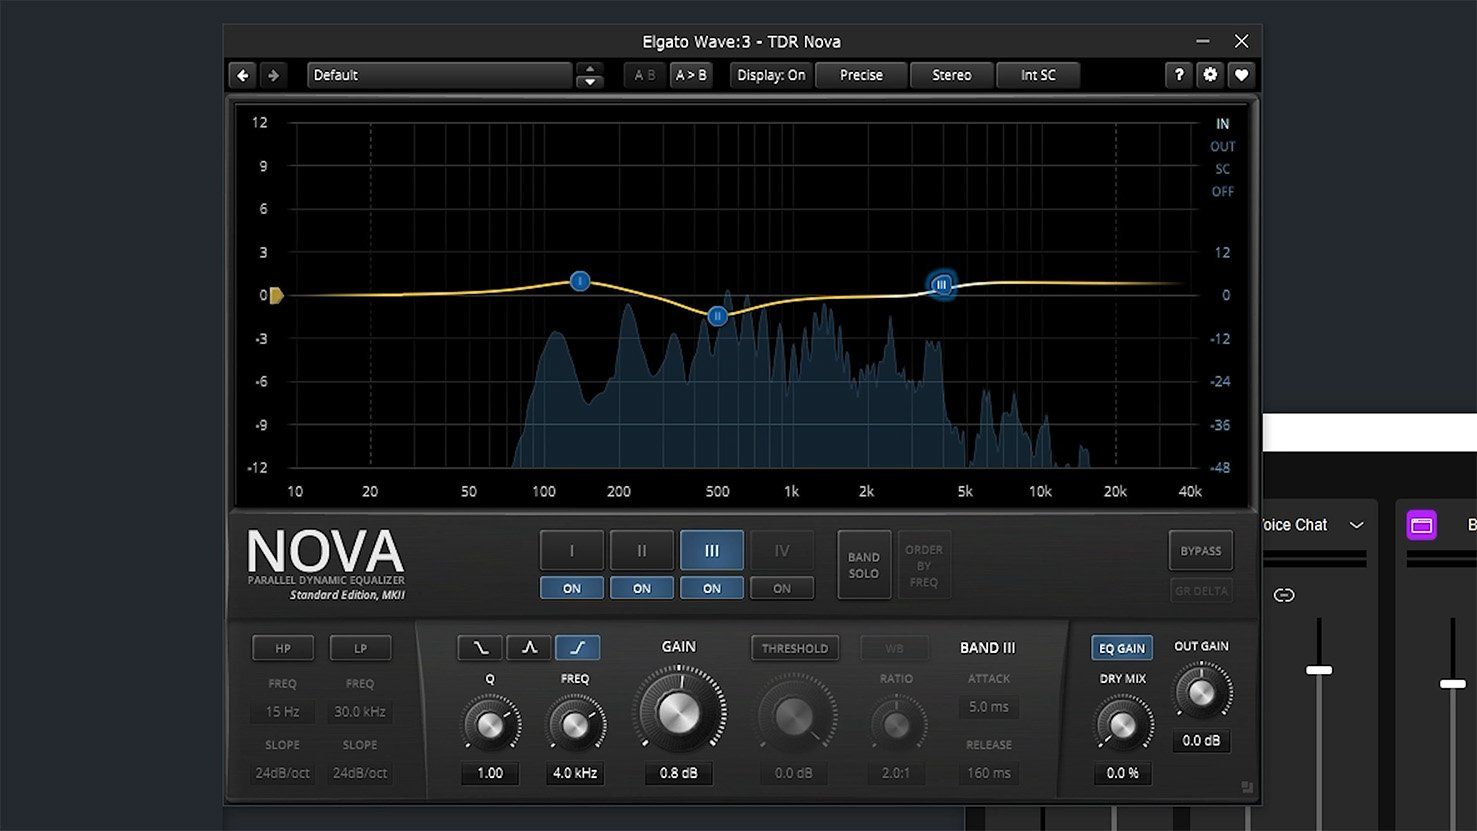
Remember, these EQ settings are intentionally subtle to avoid drastic changes, given the wide variety of voices out there. Always listen to your voice and tweak the settings based on how you want it to sound. Your voice is unique, and your EQ settings should reflect that.
Achieving Consistent Volume Levels with Compressor Plugins
The next step in our audio enhancement journey involves adding a compressor plugin to our microphone chain. A compressor helps maintain a consistent volume level, ensuring that whether you’re speaking in a normal voice or shouting in excitement, your viewers enjoy a pleasant listening experience. It achieves this by compressing volumes above a certain threshold to create a more consistent sound.
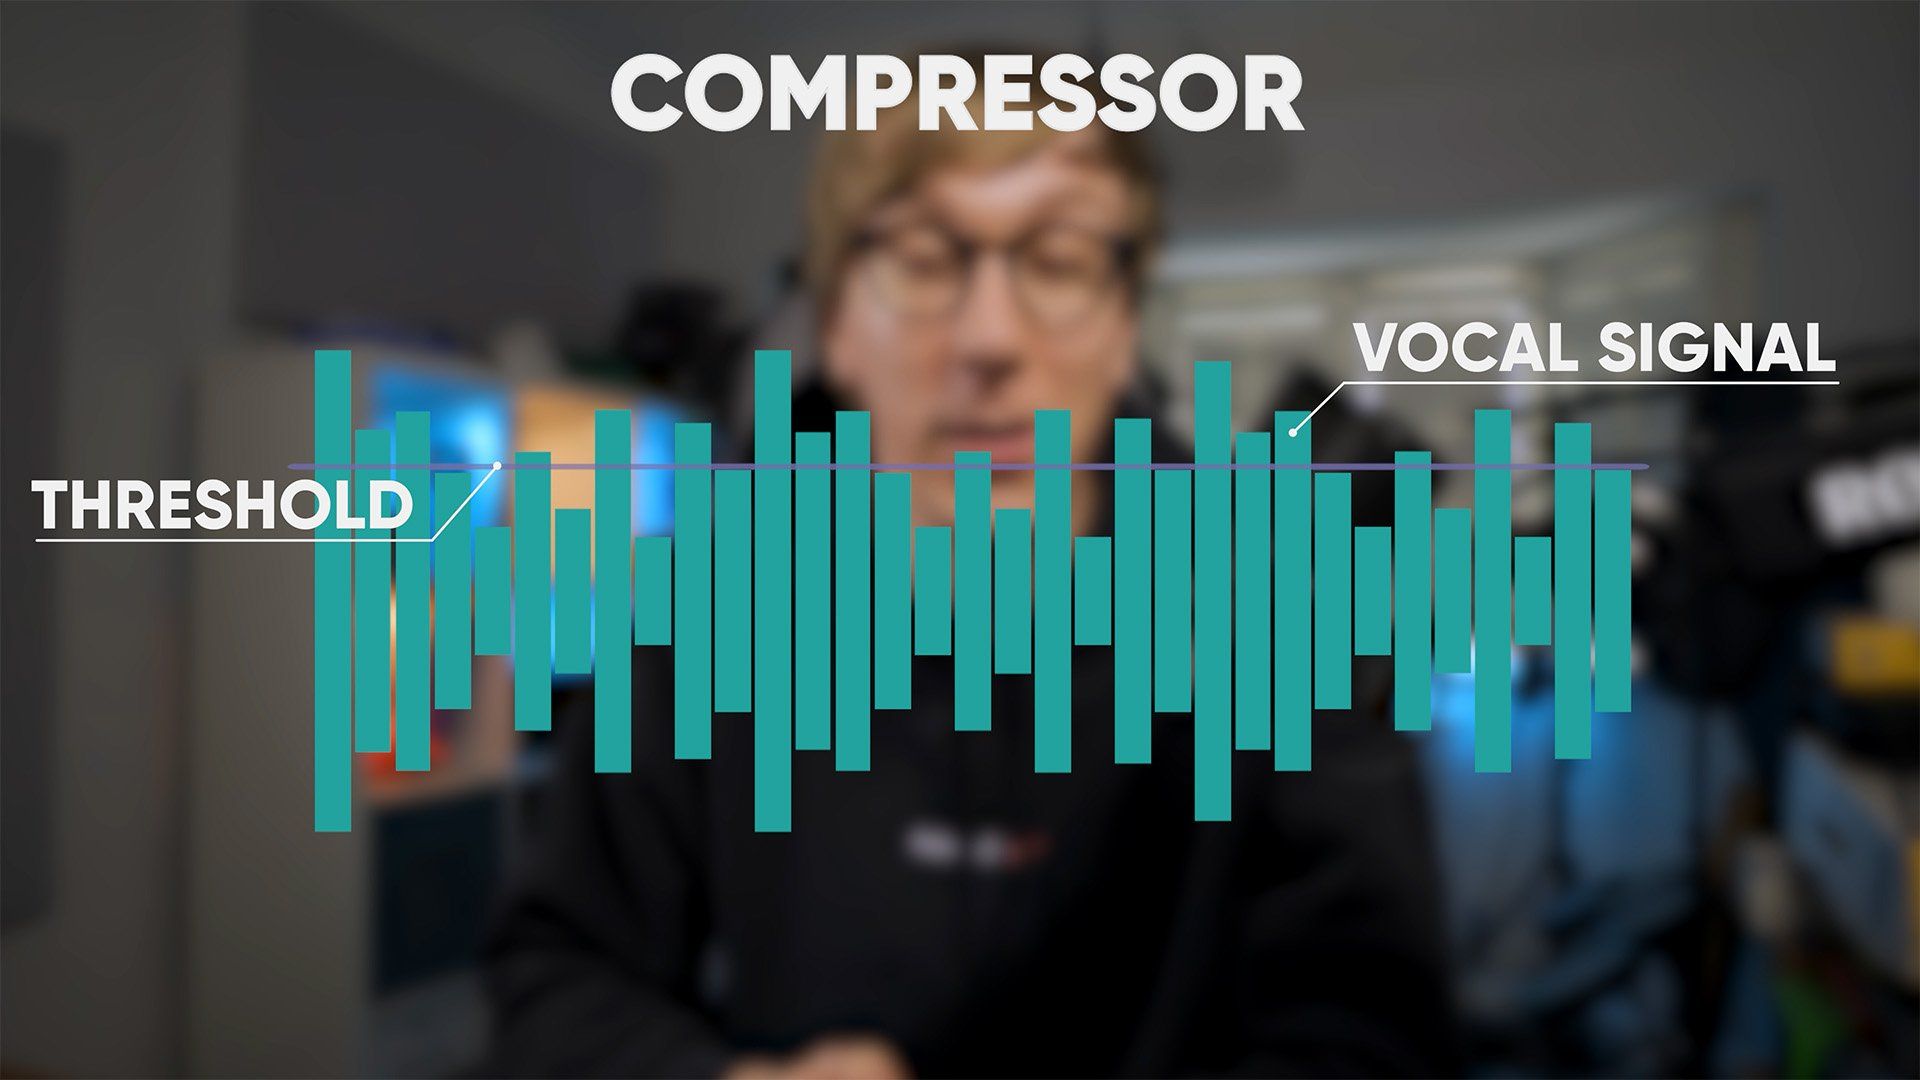
There are numerous free compressor VST plugins available online, but one that stands out is RoughRider 3 (opens in a new tab). To set up any compressor, there are three key settings you need to understand: ratio, threshold, and makeup gain.
- Ratio: This setting determines the extent of compression applied when your volume exceeds the threshold. Common ratios are
2:1,4:1,8:1, or even10:1. The higher the ratio, the more compression is applied. A ratio of4:1is typically recommended for a natural-sounding compression, but feel free to adjust this according to your preference. - Threshold (or Sensitivity in RoughRider 3): This setting is the decibel level at which the compressor starts working. Any sounds above this level will have the chosen ratio of compression applied. A recommended setting is around
-18or-20 decibels, but this may vary depending on how loud you usually are and the gain level of your microphone. - Makeup Gain: After applying a compressor, you’ll likely need to adjust your makeup gain. This is because compression reduces the overall volume when it exceeds the threshold. You can adjust this by observing your OBS meters and ensuring that when you’re speaking, you’re sitting in the
yellow zone, which is roughly around-12 decibels. Add makeup gain as needed to maintain this level.
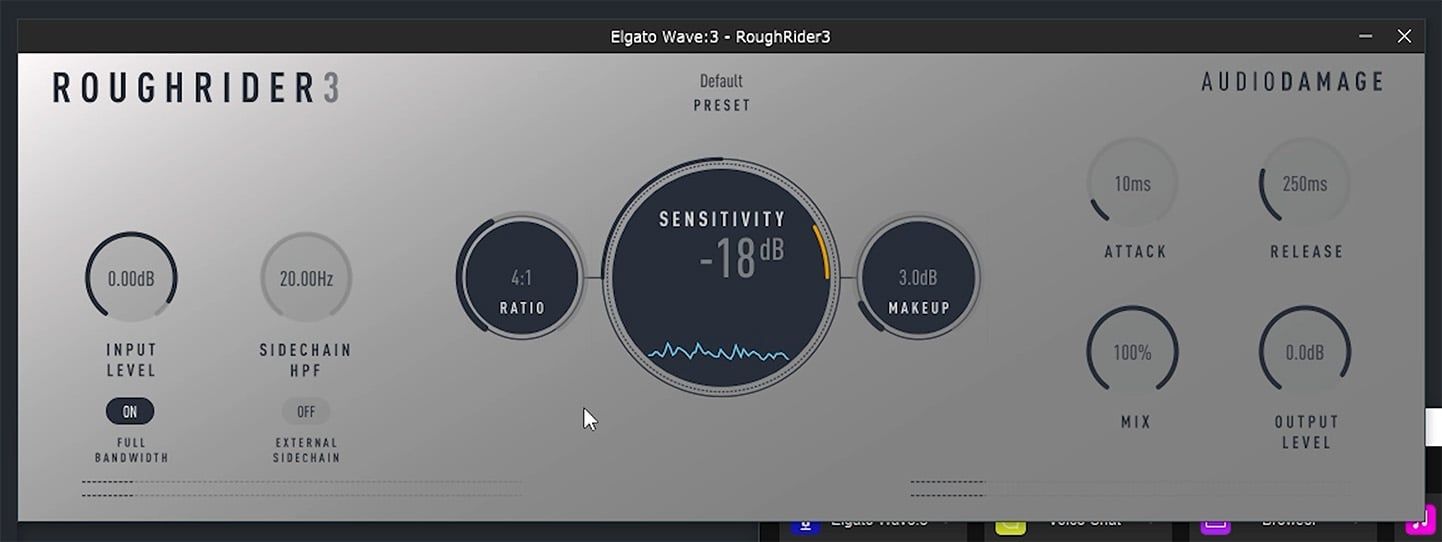
By incorporating a compressor into your audio setup, you can ensure a more consistent and enjoyable audio experience for your viewers, regardless of the fluctuations in your speaking volume.
Reducing Harshness with De-Esser Plugins
Another optional but beneficial addition to your audio setup is a de-esser. This is particularly useful for those using condenser microphones like Wave: 1 and Wave: 3. A de-esser works to reduce the harshness of the ‘S’ sound, which can be pretty fatiguing for your audience during long broadcasts. An excellent plugin for this purpose is the T-De-Esser (opens in a new tab).
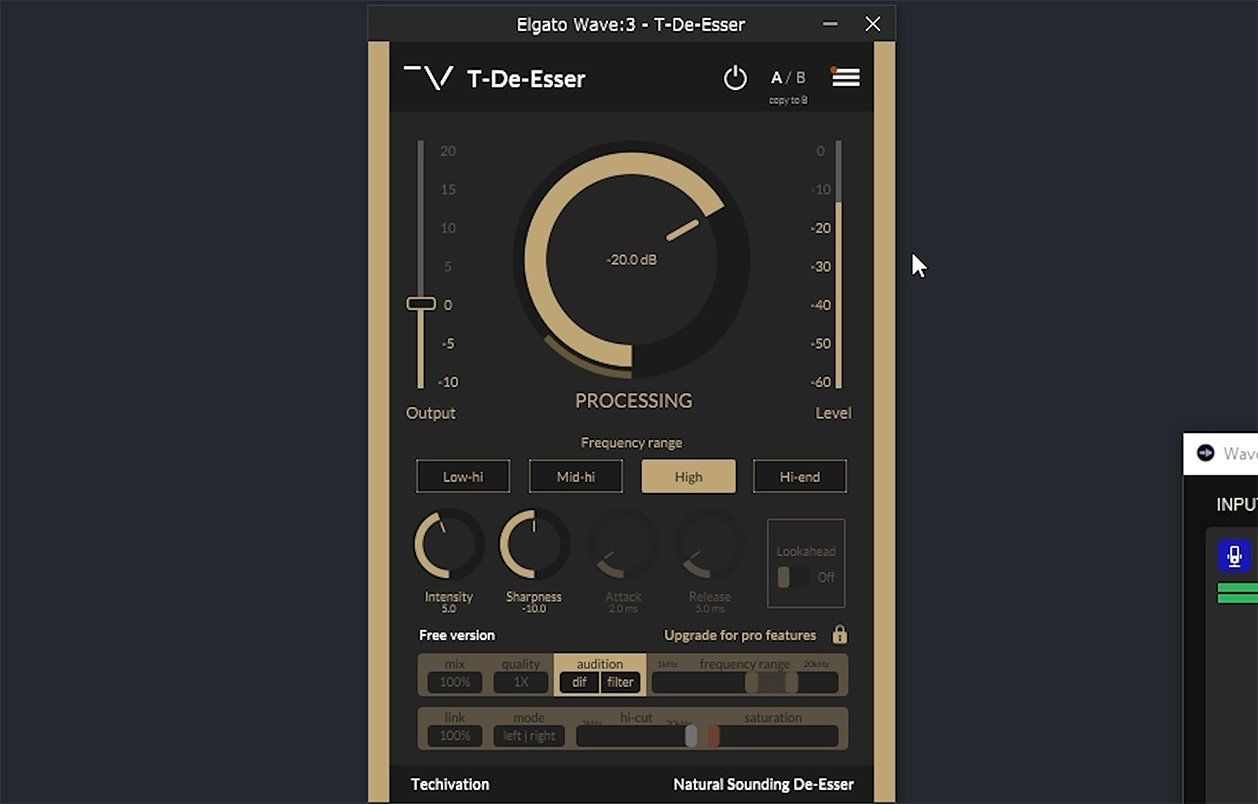
Once you’ve installed T-De-Esser and added it to your microphone chain, you’ll find two main controls within the plugin interface that you’ll need to adjust: processing and intensity.
- Intensity: This control adjusts the level of de-essing. Depending on your preference, you might want to increase the intensity. A setting around
7.0is a good starting point. - Processing: This control adjusts the actual amount of de-essing happening. A practical way to change this is by holding the ‘S’ sound and adjusting the processing until you see its effect on the level in real time. The level of processing you end up using largely depends on your personal preference. A good starting point is to ensure a few decibels of harshness are removed whenever you use words that have sibilance.
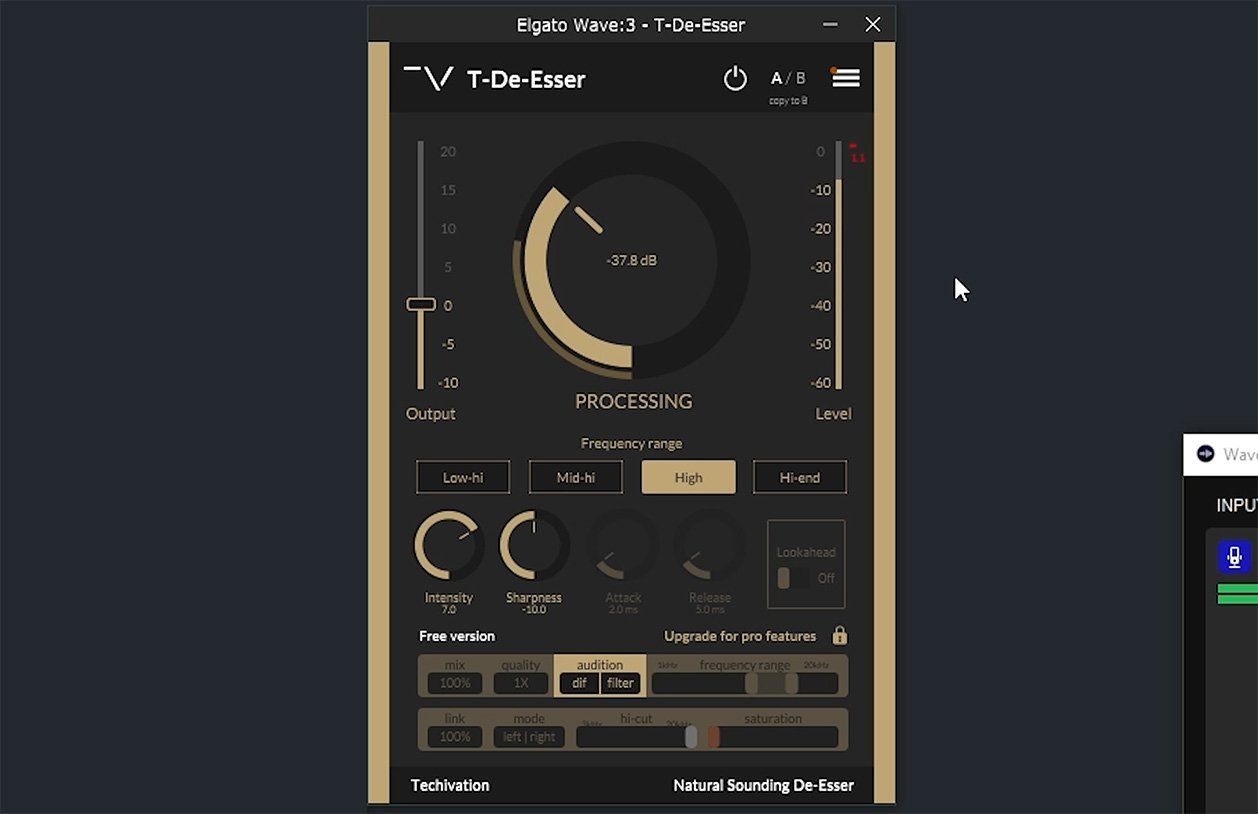
Remember, the changes you’re making here are subtle, but they can significantly improve the sound of your microphone. Every improvement you make, no matter how small, contributes to a more enjoyable listening experience for your audience.
Optional: Noise Suppression Plugins
The fifth plugin we’ll discuss is optional and depends on the noise level in your streaming environment. If you find that noise is still coming through when you speak, even with a noise gate, you might want to consider a noise suppression filter.
There are two recommended paths for noise suppression. If you have an NVIDIA Card and want results similar to NVIDIA Broadcast, you can use a VST plugin developed by Xaymar (opens in a new tab). Alternatively, you can use a VST plugin based on the RNNoise suppression filter (opens in a new tab), which is also found within OBS Studio. This filter is excellent at removing constant background noise, but it doesn’t learn or adapt to the noise environment.
If you decide to add a noise suppression filter to your microphone chain, it’s critical to ensure it’s applied at the beginning of your chain, before the EQ, compression, or de-essing. This allows the filter to process the raw audio input, providing a cleaner signal for the subsequent plugins in the chain.
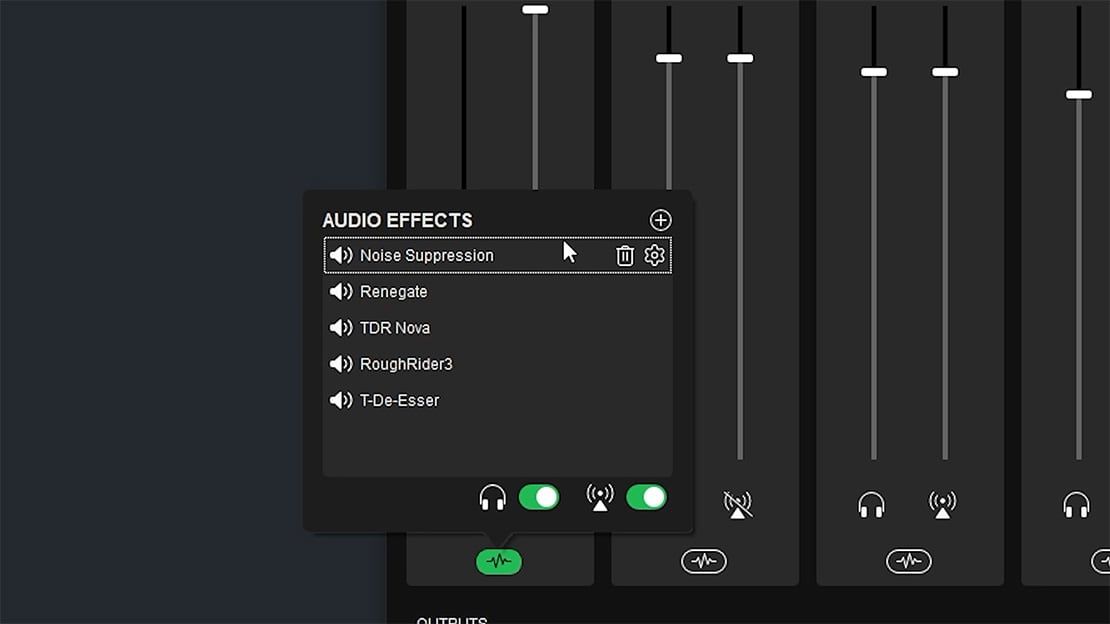
Remember, while noise suppression can be beneficial in noisy environments, it’s not necessary for everyone. Always consider your specific needs and circumstances when deciding on the best plugins for your setup.
Bonus Tips: Maximizing Your Microphone Chain
Now that you’ve set up your microphone chain, here are some additional tips to help you make the most of your new setup:
Using Elgato’s Wave Link Microphone Effects
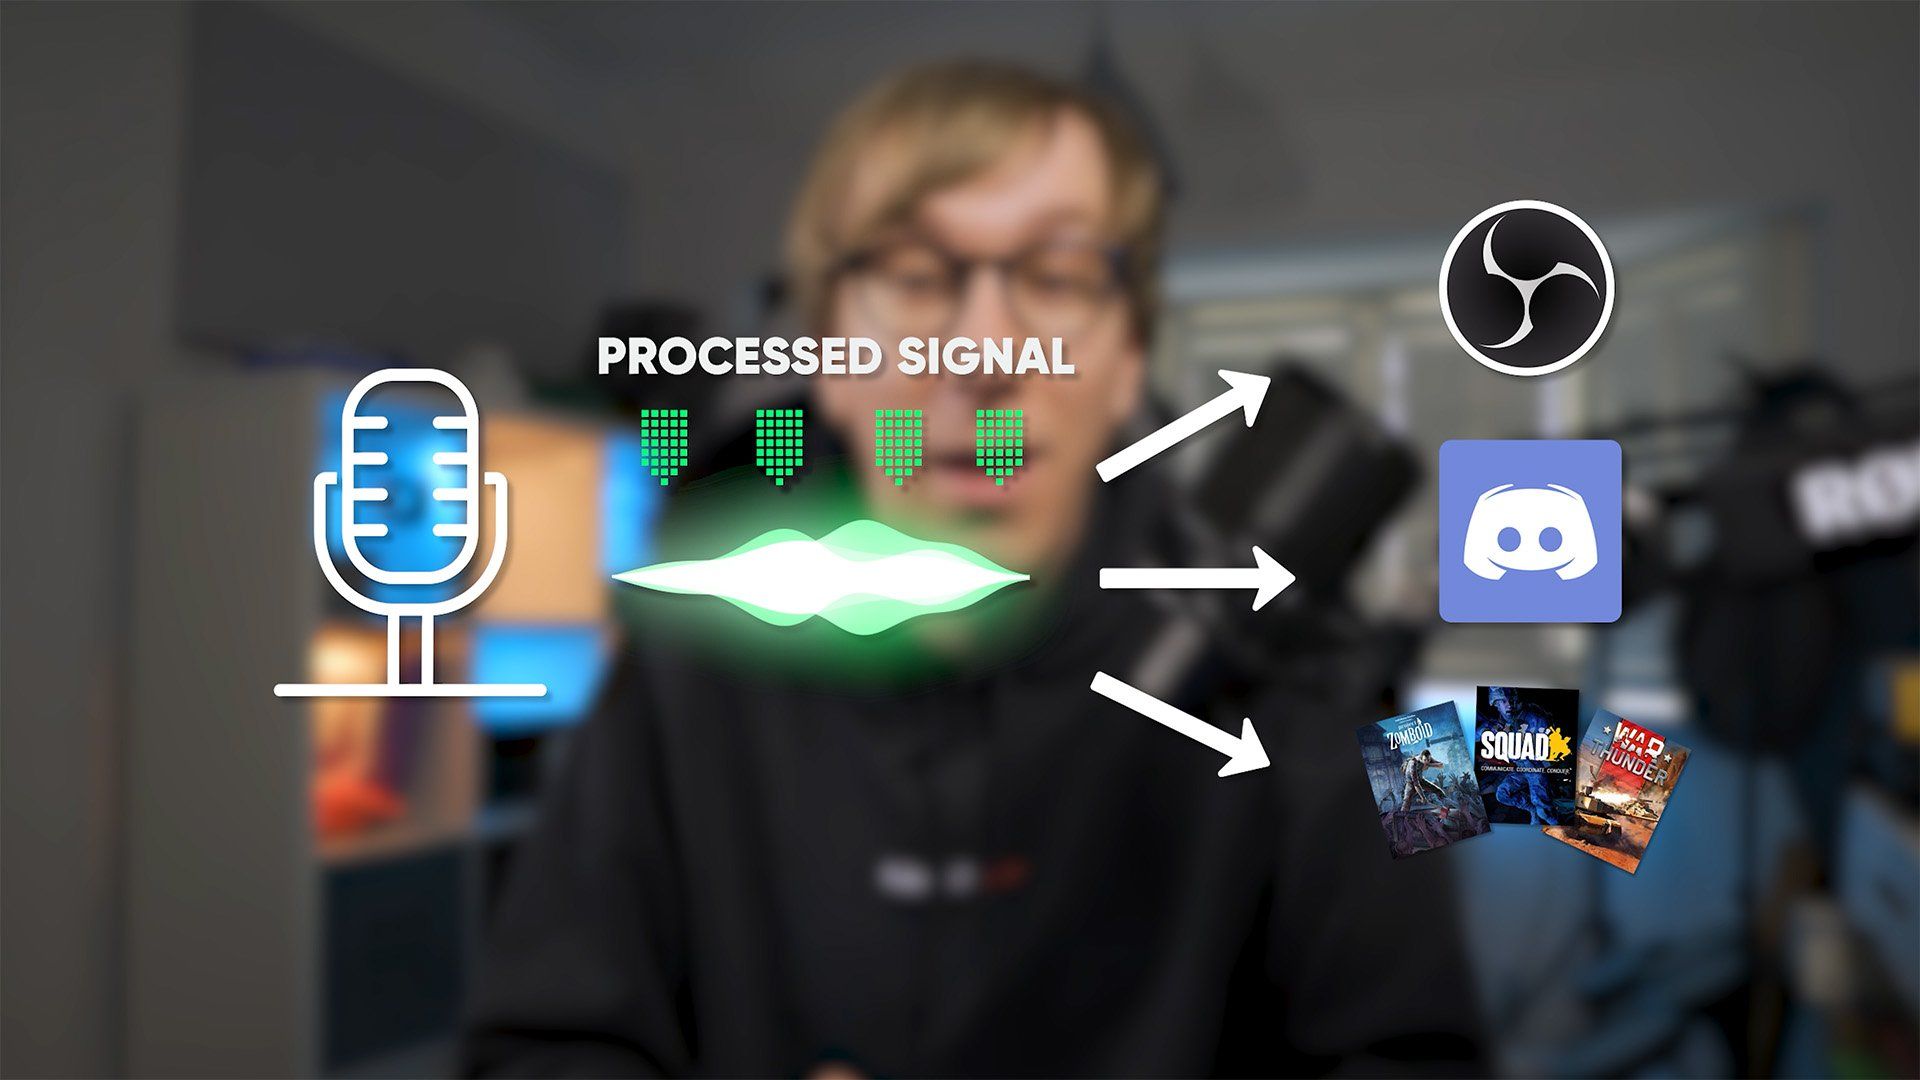
Elgato has added a new audio device to your system that allows you to use your new microphone chain across different programs. This device, called Wave Link MicrophoneFX, can be used as your microphone input in programs like Discord, your favorite games, or even Zoom. This means you can enjoy the benefits of your full audio chain, complete with all the VST plugins you’ve added, across different platforms.
Toggling Audio Effects
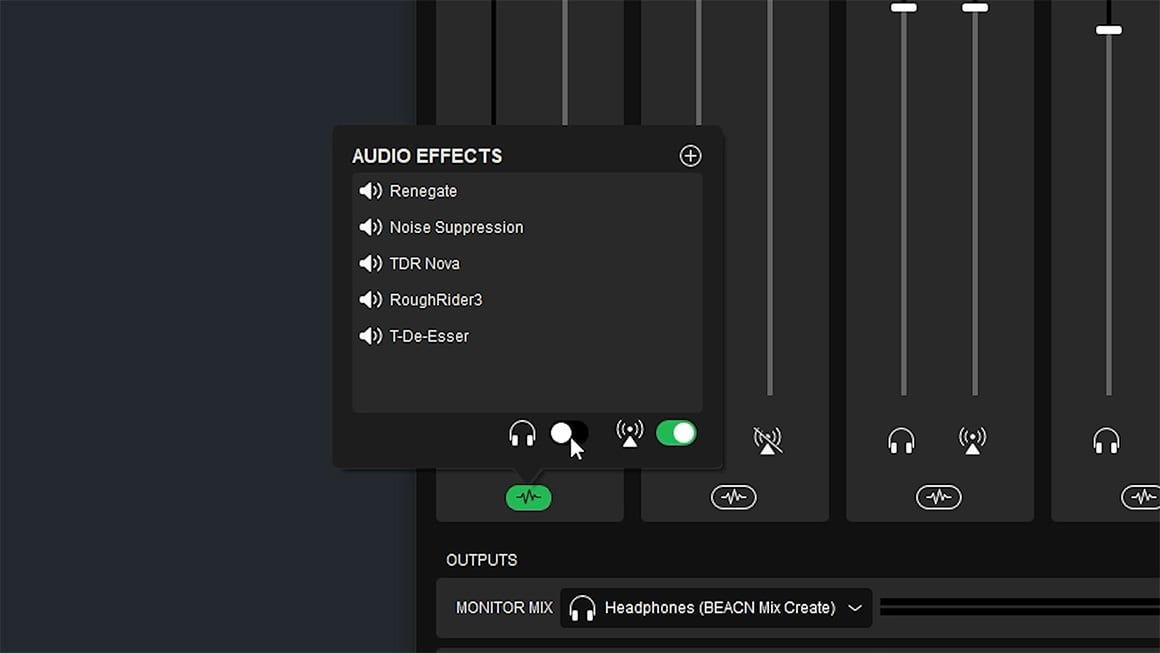
You can choose whether these audio effects apply to just your stream mix or also your monitor mix. If you prefer not to hear the plugin effects in your own headphones, you can easily toggle this within the software.
Using the Elgato Stream Deck
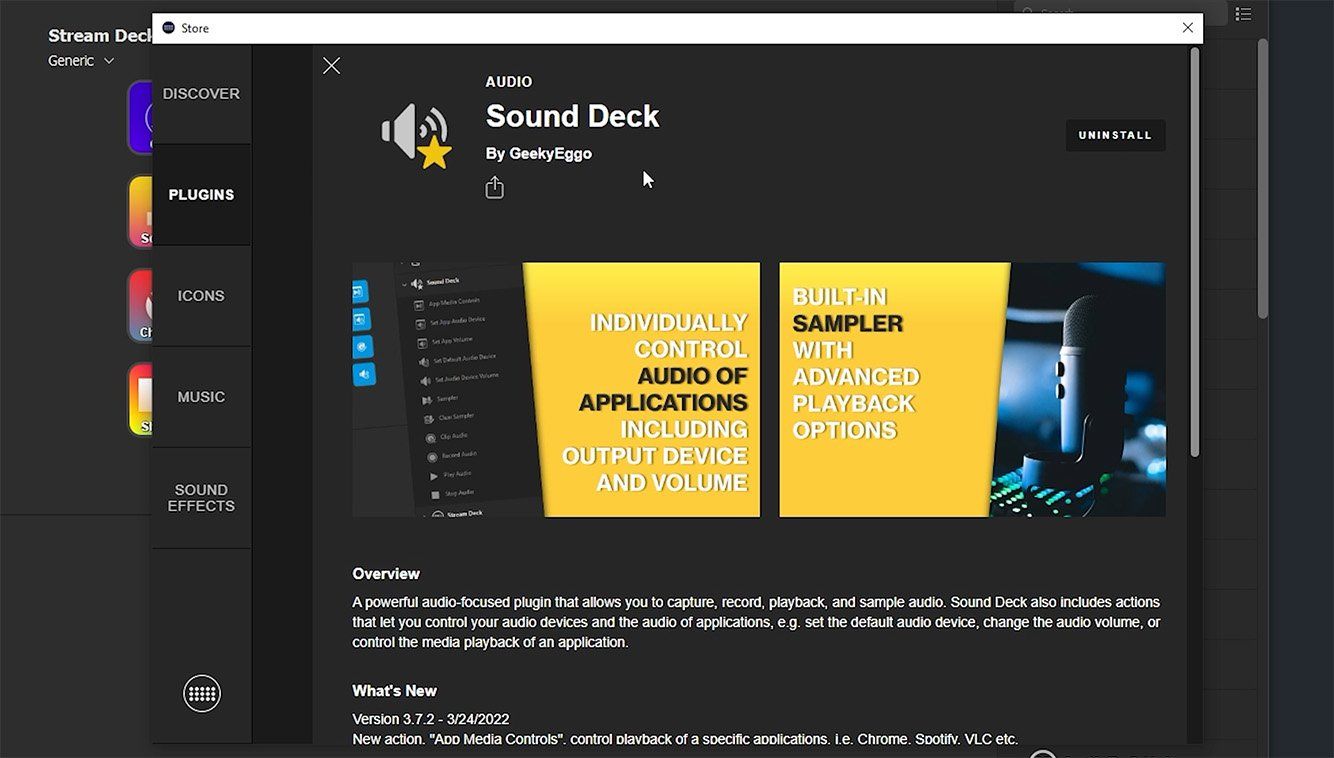
If you own the Elgato Stream Deck, you can add the Sound Deck plugin. The sampler action allows you to sample your microphone in real-time and playback that sample. This is a handy tool for quick testing when changing your EQ or any of the plugins we’ve discussed.
Order of Audio Effects
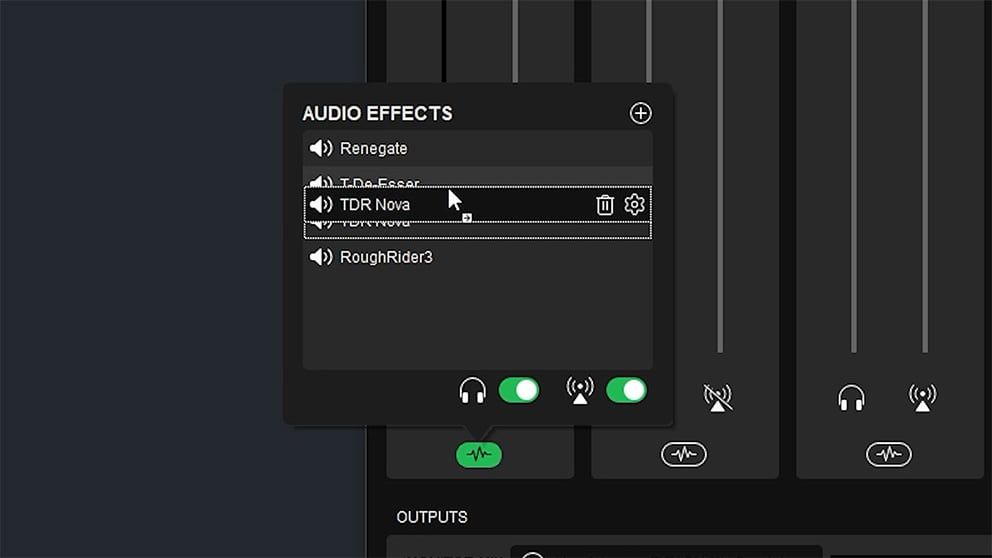
The audio effects we’ve applied are processed in order from top to bottom. You can rearrange them by dragging and dropping them. While some people prefer to compress before they EQ rather than EQ before they compress, it’s generally recommended to place your noise gate and noise suppression at the start of the chain.
Applying Effects to Other Channels
You aren’t limited to applying effects to your microphone chain. You can add VST filters to any of the different channels within Wave Link. For example, you could add a compressor to your Voice Chat channel to maintain consistent volume levels among teammates with different audio setups. Alternatively, you could add a limiter to your music channel to ensure no songs exceed a certain volume level.

By utilizing these tips, you can ensure that your audio setup is not only optimized for your needs but also flexible enough to provide a quality audio experience across various platforms and situations.
Summary
In conclusion, optimizing your livestreaming audio doesn’t have to be a daunting task. With the right tools and a bit of knowledge, you can significantly enhance your audio quality using free VST plugins. From noise gates and compressors to EQ and de-essers, these plugins offer a range of options to improve your sound. Remember, it’s all about experimentation and finding what works best for your unique voice and setup. With these tips and plugins in your audio toolkit, you’re well on your way to delivering a superior audio experience for your audience.
Video Guide
As with all of our guides, below we have included a full video tutorial if that is your preferred method of learning.
