Make the Switch: Step-by-Step Guide on Moving from Streamlabs to OBS Studio
Learn how to make the switch from Streamlabs to OBS Studio with our easy-to-follow guide. Step-by-step instructions are included to make the process painless!

For those who don’t know, Streamlabs (opens in a new tab) recently had what can only be described as a catastrophic day’s disaster on social media (opens in a new tab). When you have OBS (opens in a new tab), Elgato (opens in a new tab), Lightstream (opens in a new tab), and Edward Swowden (opens in a new tab) all bashing you simultaneously, you know you messed up.
I’m not going to get into the details here, if you want to hear what happened (opens in a new tab) and my thoughts on it, we discussed it in great detail in this podcast episode.
Instead, I want to turn this negative situation into a positive and show all of you that have been using Streamlabs for either your streaming software or as your alerts and donations provider, exactly how you can move away from using them to better alternatives like OBS Studio (opens in a new tab) and StreamElements (opens in a new tab).
Step 1: Moving Scenes and Sources from Streamlabs to OBS Studio
The first thing you need to do is move over all your scenes and sources from Streamlabs Desktop (opens in a new tab) (previously called Streamlabs OBS) into OBS Studio.
To do this, you need to have OBS Studio (opens in a new tab) installed, but first, you need to choose what you want to import from Streamlabs Desktop.
Open up Streamlabs Desktop, click the little dropdown arrow next to your scenes, and then click Manage All. This will show you all of the different scene collections you have in Streamlabs Desktop.
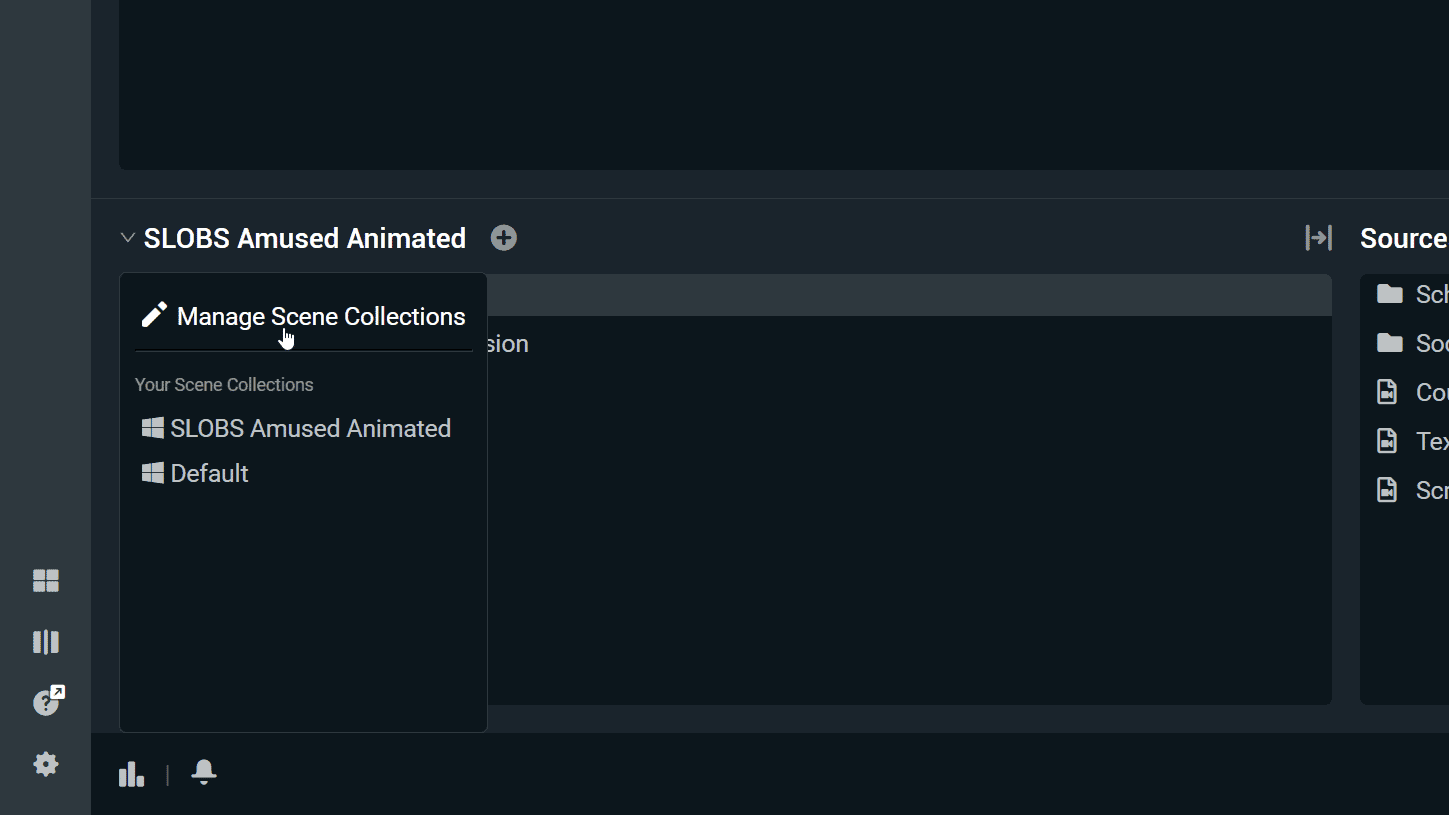
Take note of the collections you want to import into OBS Studio. Typically, a collection includes a stream-starting scene, a chatting scene, a gameplay scene, and a stream-ending scene.
Next, open up OBS Studio and head to Settings → General → Importers and make sure the option Search known locations for scene collections when importing is enabled. Then you can come up to Scene Collection → Import to start importing.
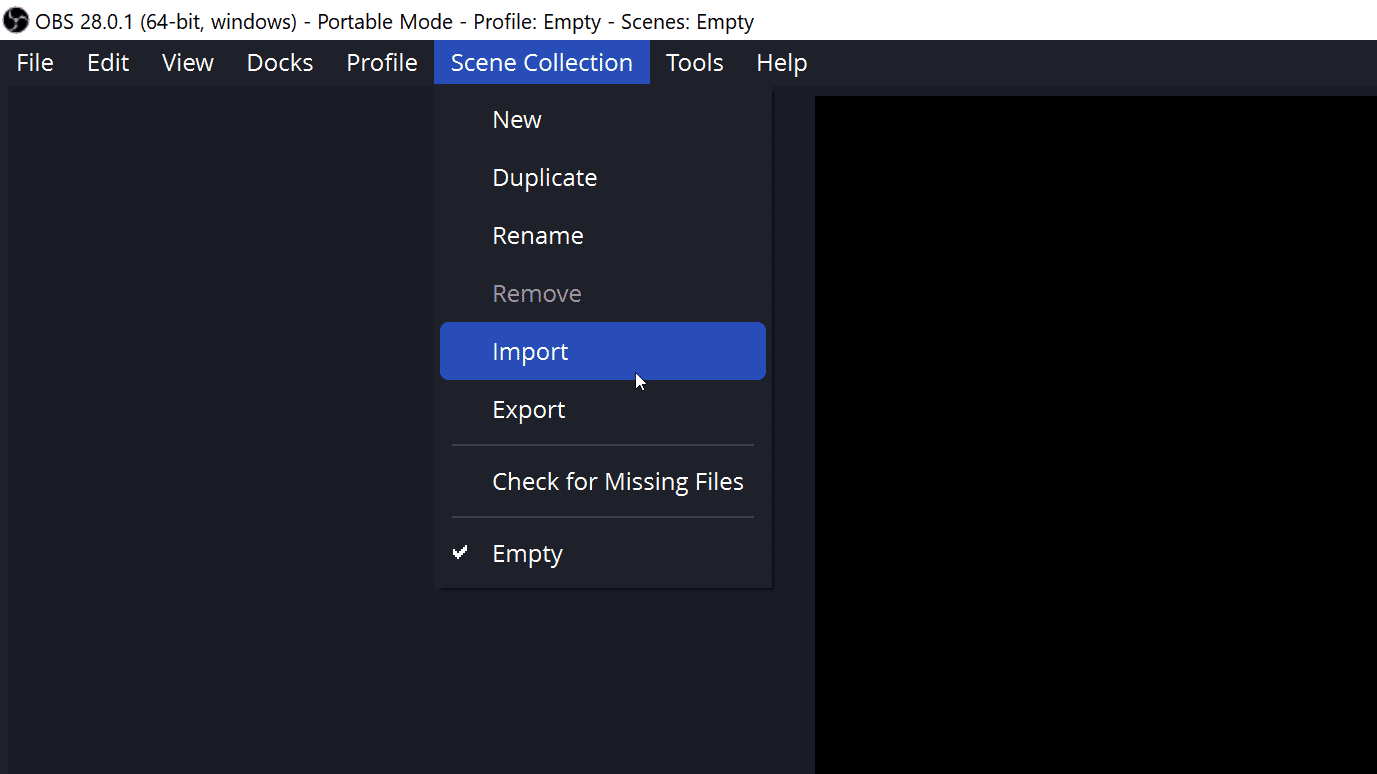
This will scan all the known locations of other streaming apps you have used previously, like XSplit, Twitch Studio, and Streamlabs Desktop. Check the boxes of the scene collections you want and click Import.
Next, select Scene Collection from the menu bar, and choose the collection you just imported. OBS will then use that scene collection, and all the elements from Streamlabs Desktop should transfer over.
While some elements may need minor adjustments, such as refreshing a browser source, everything should have been imported correctly.
Step 2: Moving Stream Settings to OBS Studio
Unfortunately, there isn’t a super simple way to move all your stream settings over from Streamlabs Desktop to OBS Studio, so instead, you have two options.
If you are happy with all your stream settings from Streamlabs, you can open up the settings there and make a note of things like your bitrate, encoder, resolution, and framerate, and then use those same settings in OBS Studio.

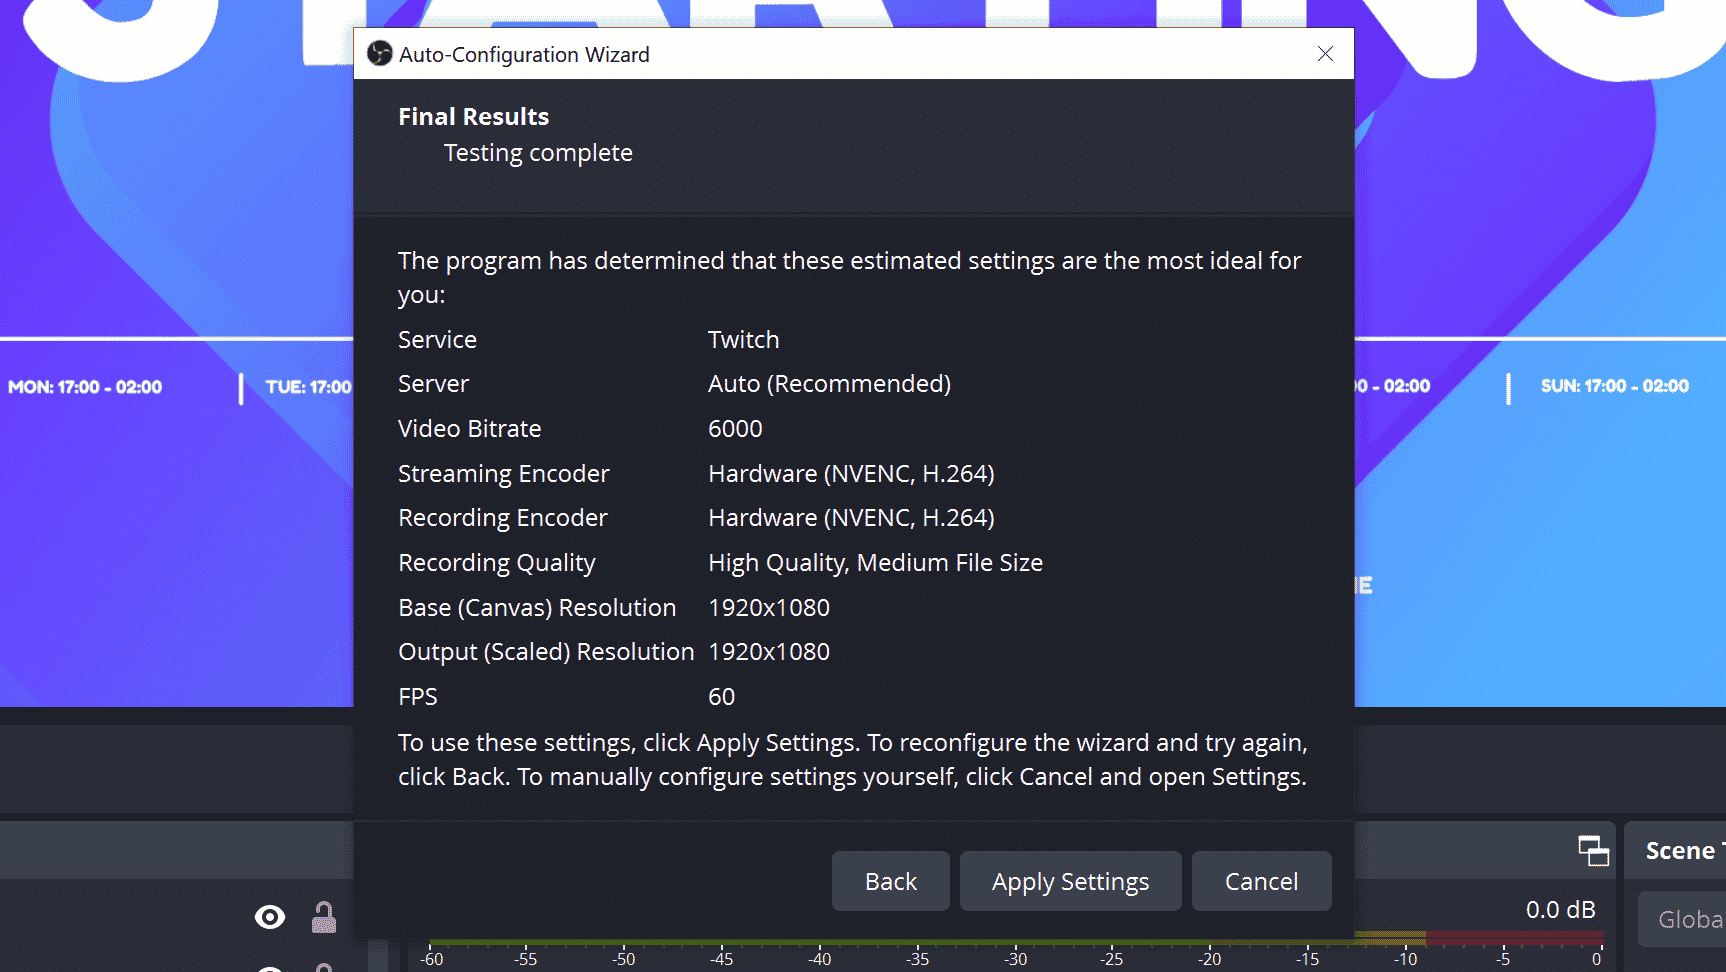
If you prefer a faster and easier setup method, use the Auto-Configuration Wizard in OBS Studio. You can find it in the Tools menu. This wizard tests your system and internet connection to determine the best settings for you.
Once the tests are complete, you can choose to apply the recommended settings, which include the encoder, bitrate, resolution, and frame rate – all selected by OBS for the optimal stream setup.
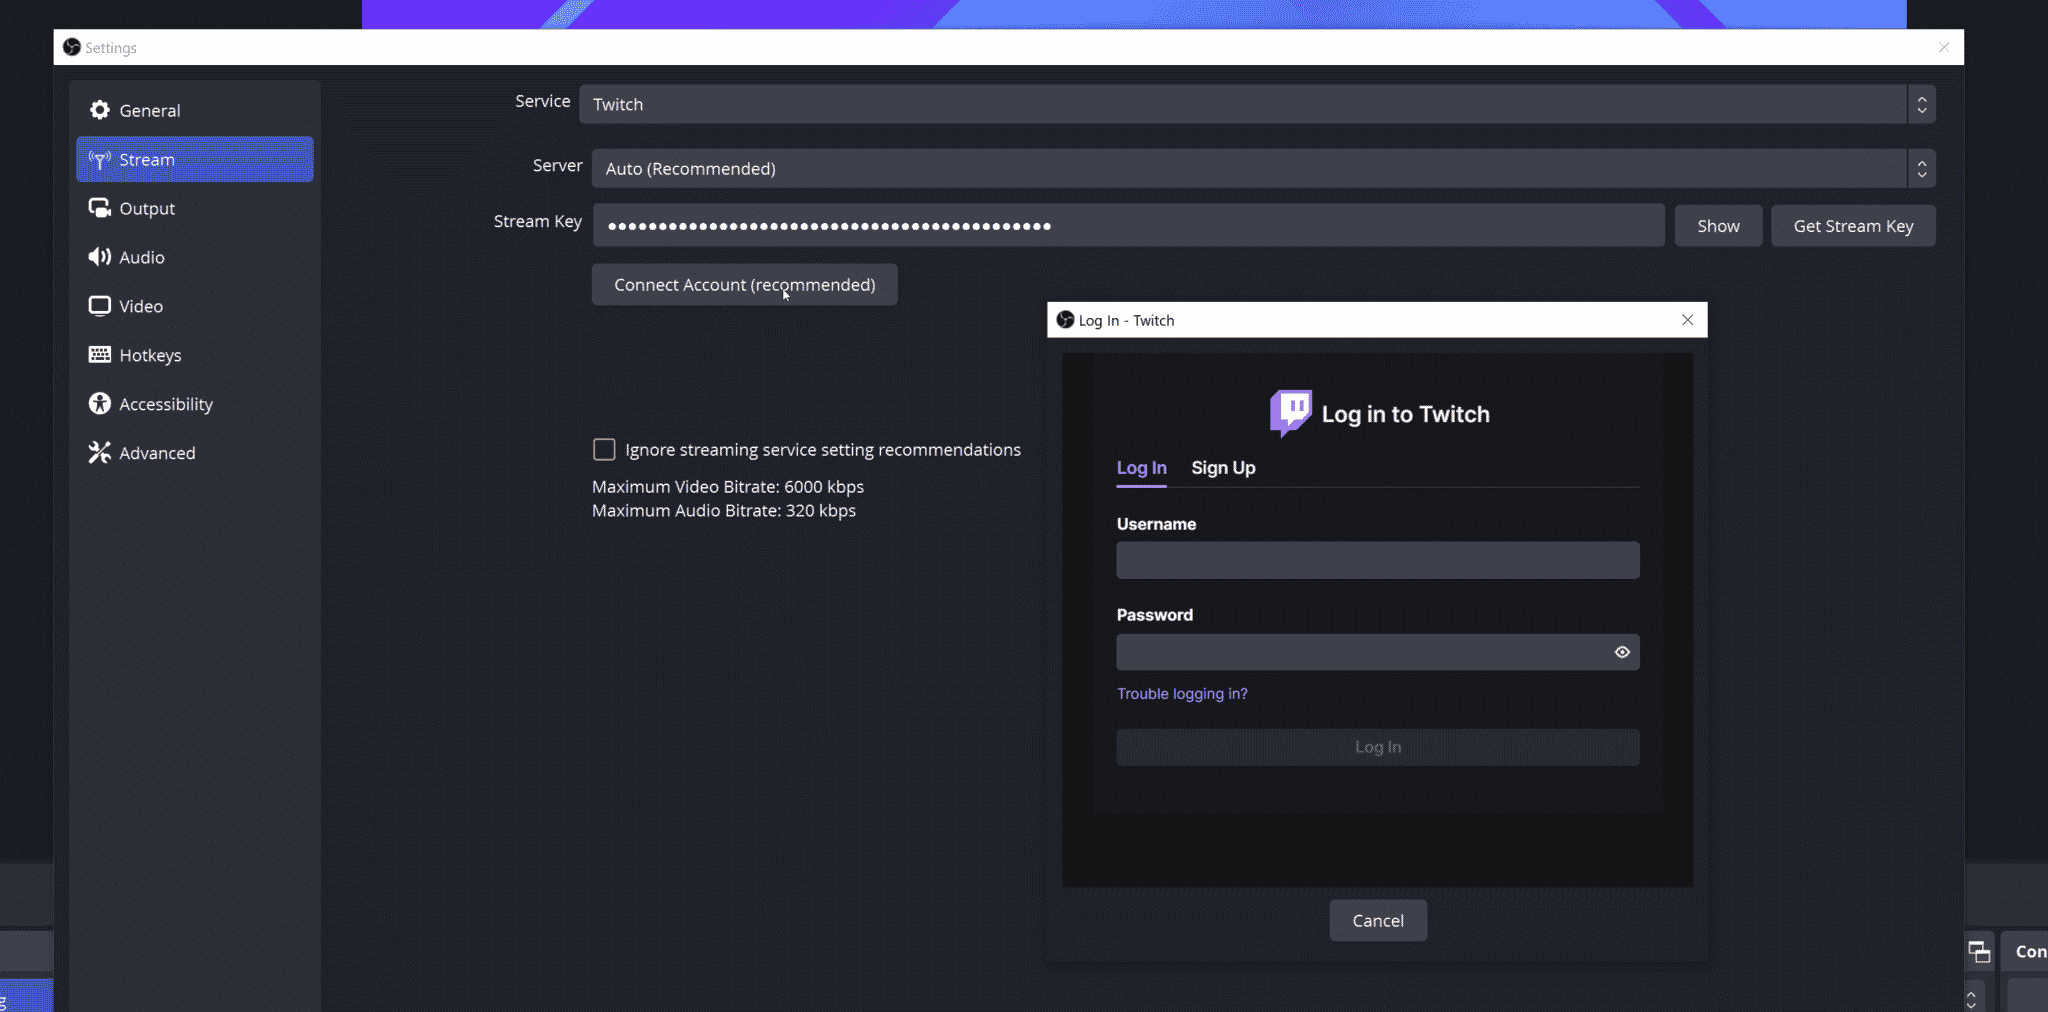
If you’re streaming to Twitch or YouTube, it’s highly recommended to connect your account to OBS Studio, as it offers more features like dockable chat and activity feeds.
To do this, open OBS Studio’s settings, go to the Stream tab, select the Service you want to stream to (e.g. Twitch) and select Connect Account.
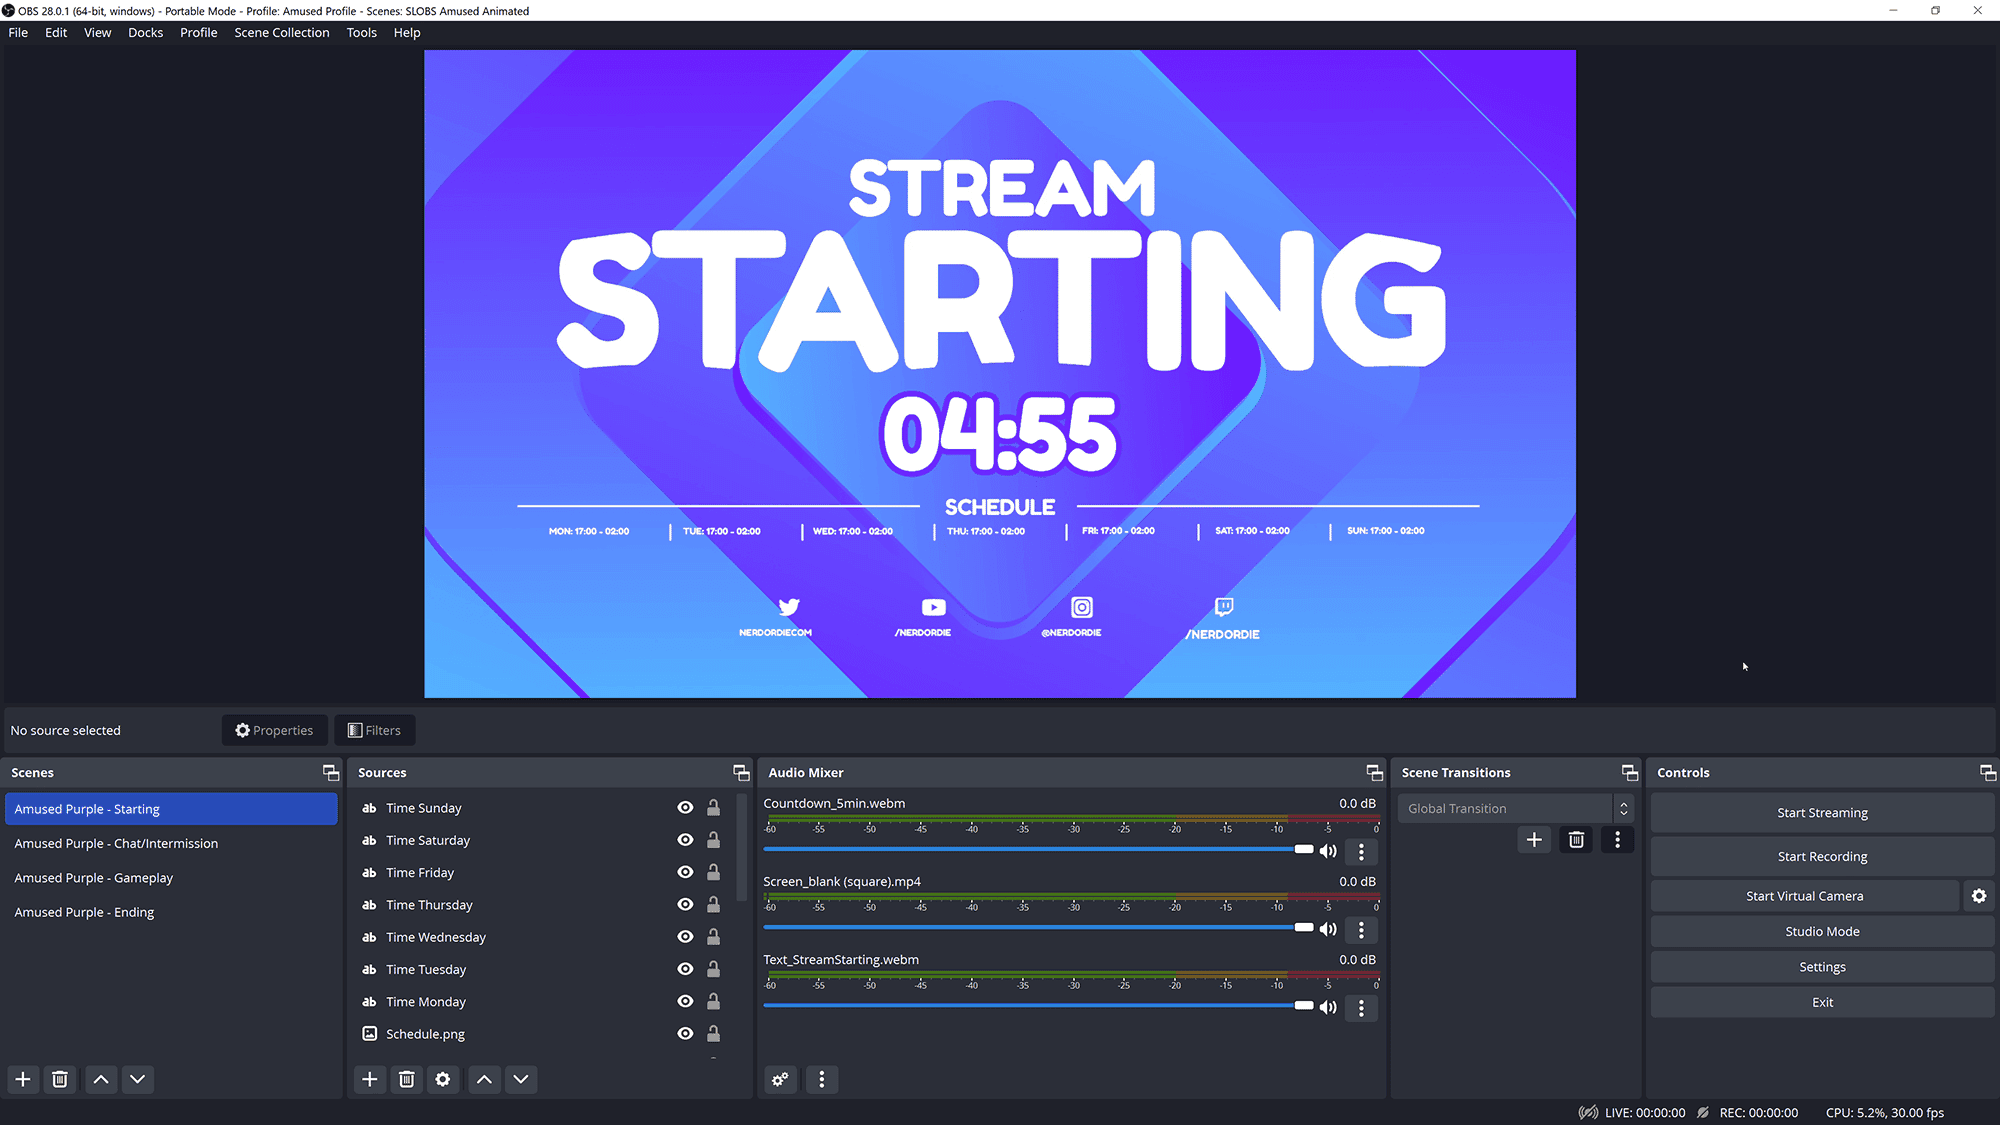
When it comes to customizability, OBS Studio lets you fully customize your layout. You can move and resize elements to get your desired setup, even matching your Streamlabs layout with a little effort.
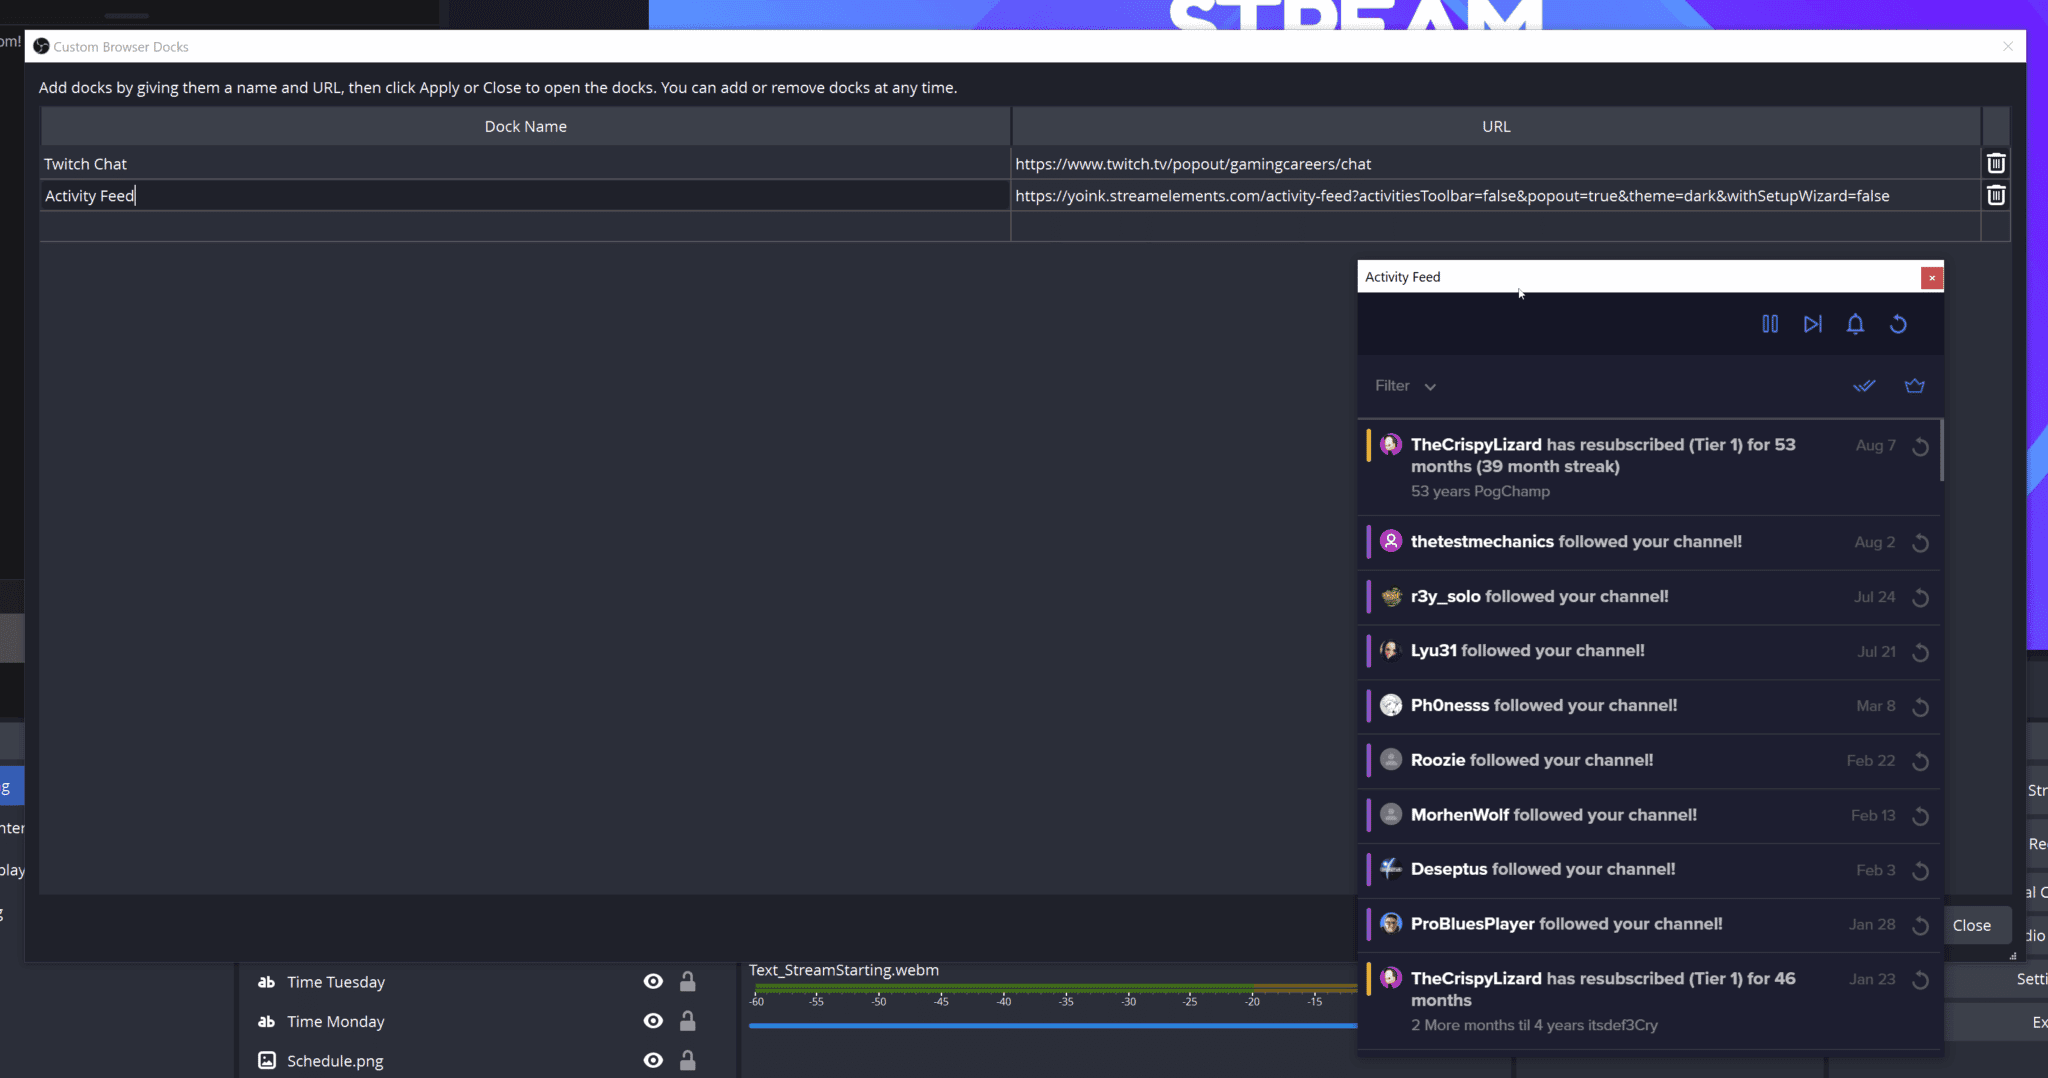
Moreover, you can add any webpage as a docked element – popular choices include activity feeds from tools such as StreamElements (opens in a new tab). Although it can be a bit finicky, with OBS Studio you can get everything just the way you want it.
Step 3: Moving Alerts to StreamElements
Many platforms offer alerts when someone donates, subscribes, or follows you. If you’re willing to support a company affected by recent events, Lightstream has an alert platform called Rainmaker (opens in a new tab)you could try.
However, this tutorial will use the most popular alternative, StreamElements. It offers the closest feature match to Streamlabs.
Here’s how to get started:
- Log in to StreamElements (opens in a new tab) using a Chrome-based browser.
- Click on your profile picture and select
Import, thenStreamlabs. - This will open an extension built to export your alerts quickly from Streamlabs to StreamElements. You can remove the extension once the export is complete.
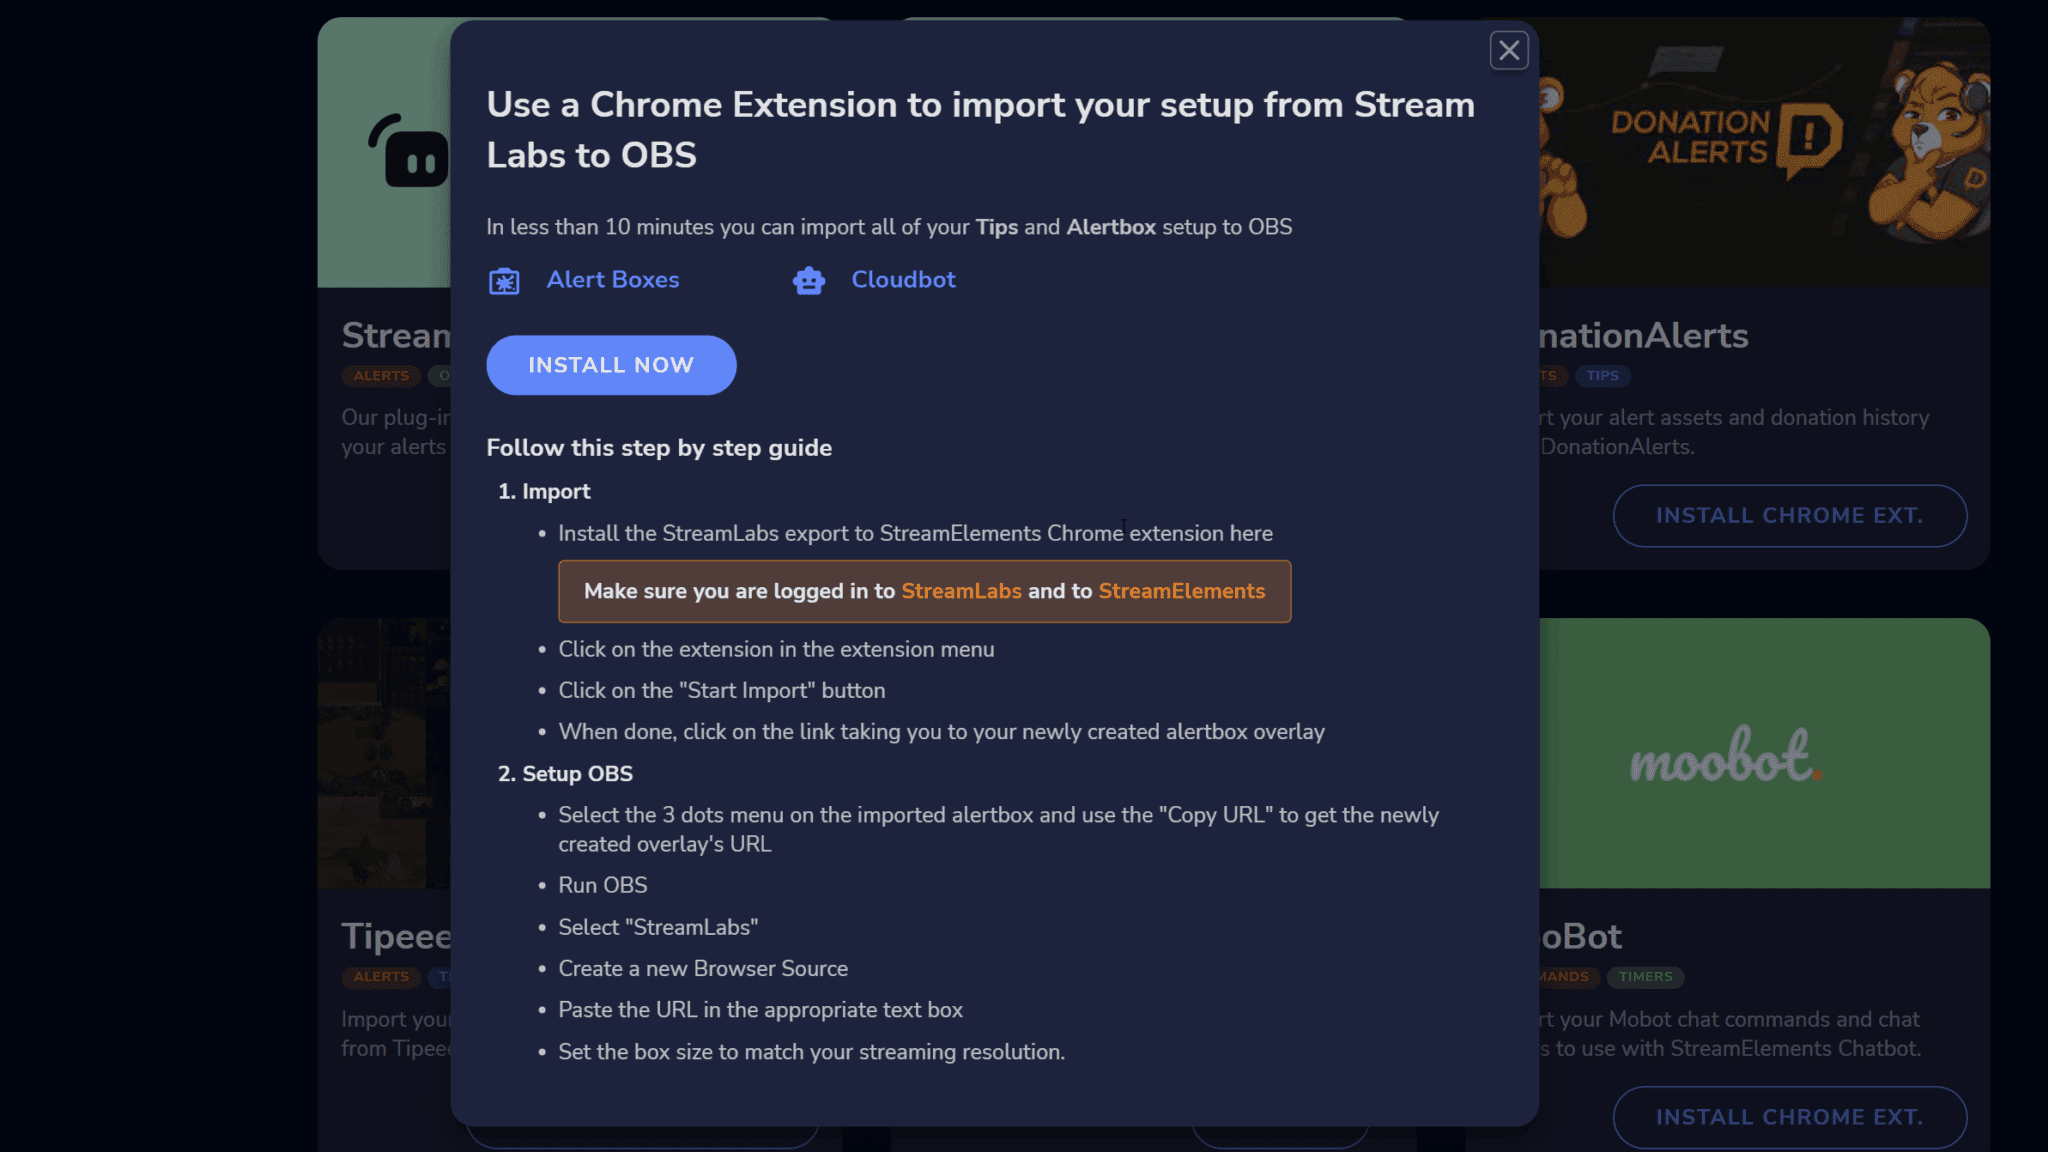
- Click
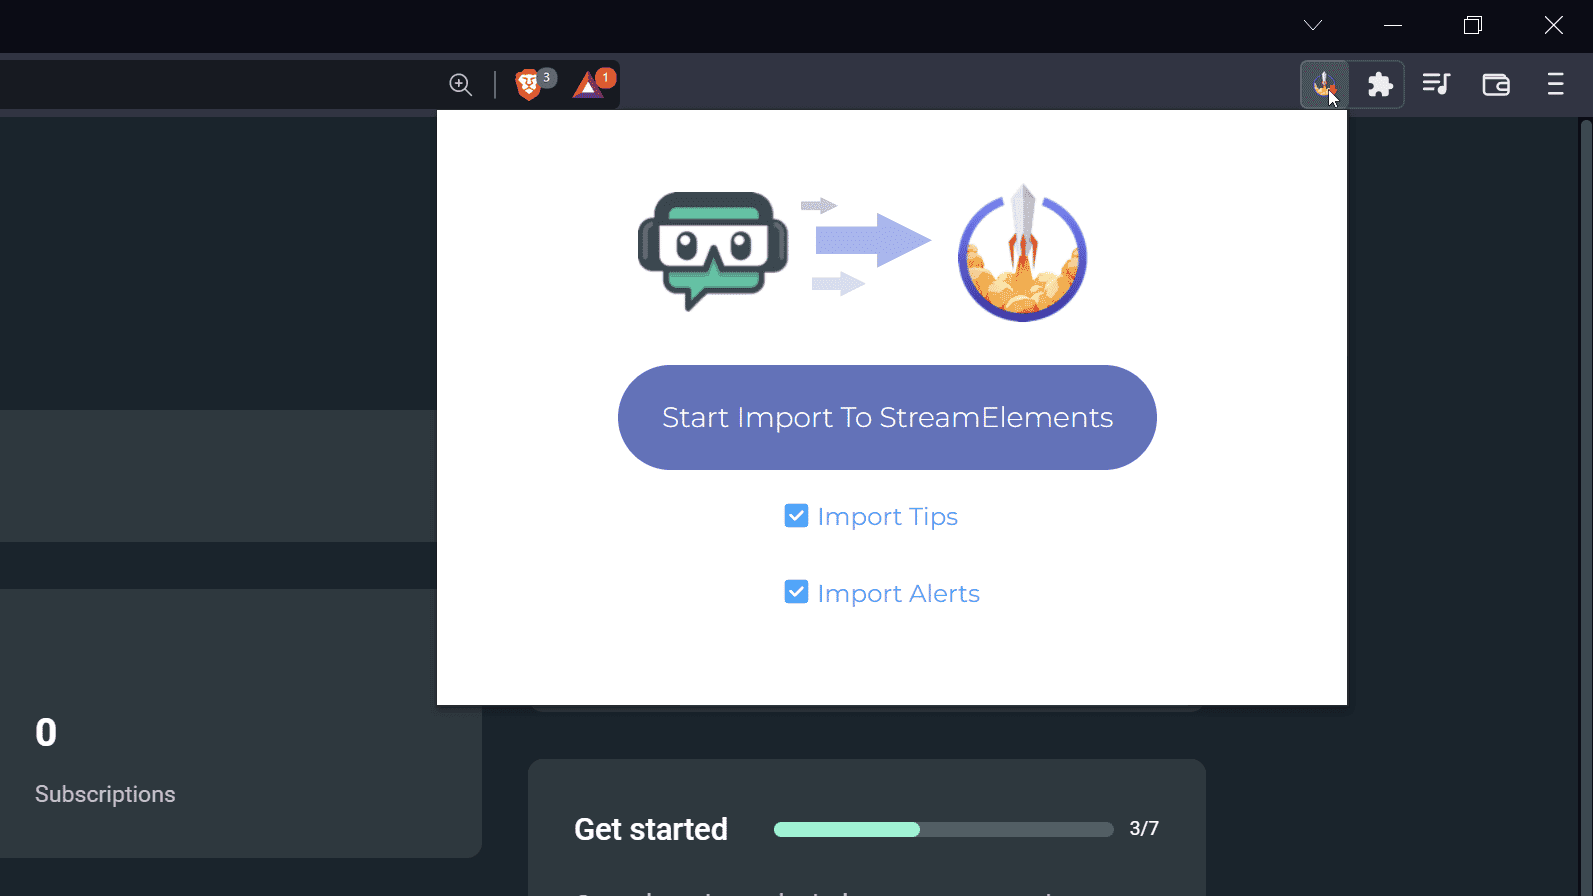
Install Nowand then head over to Streamlabs (opens in a new tab). - Open the extension and select if you want to import tips and alerts or just alerts. Click
Start Import to StreamElements.
- Once the import is complete, go to StreamElements, go down to your overlays and you should see a newly imported alert box.
- Click
Editand check that everything is imported correctly. Emulate a few events such as a new follower, subscriber, or donator, and make sure the alert is displaying. If anything needs changing, you can customize the image, audio, or sizing in the alert settings.

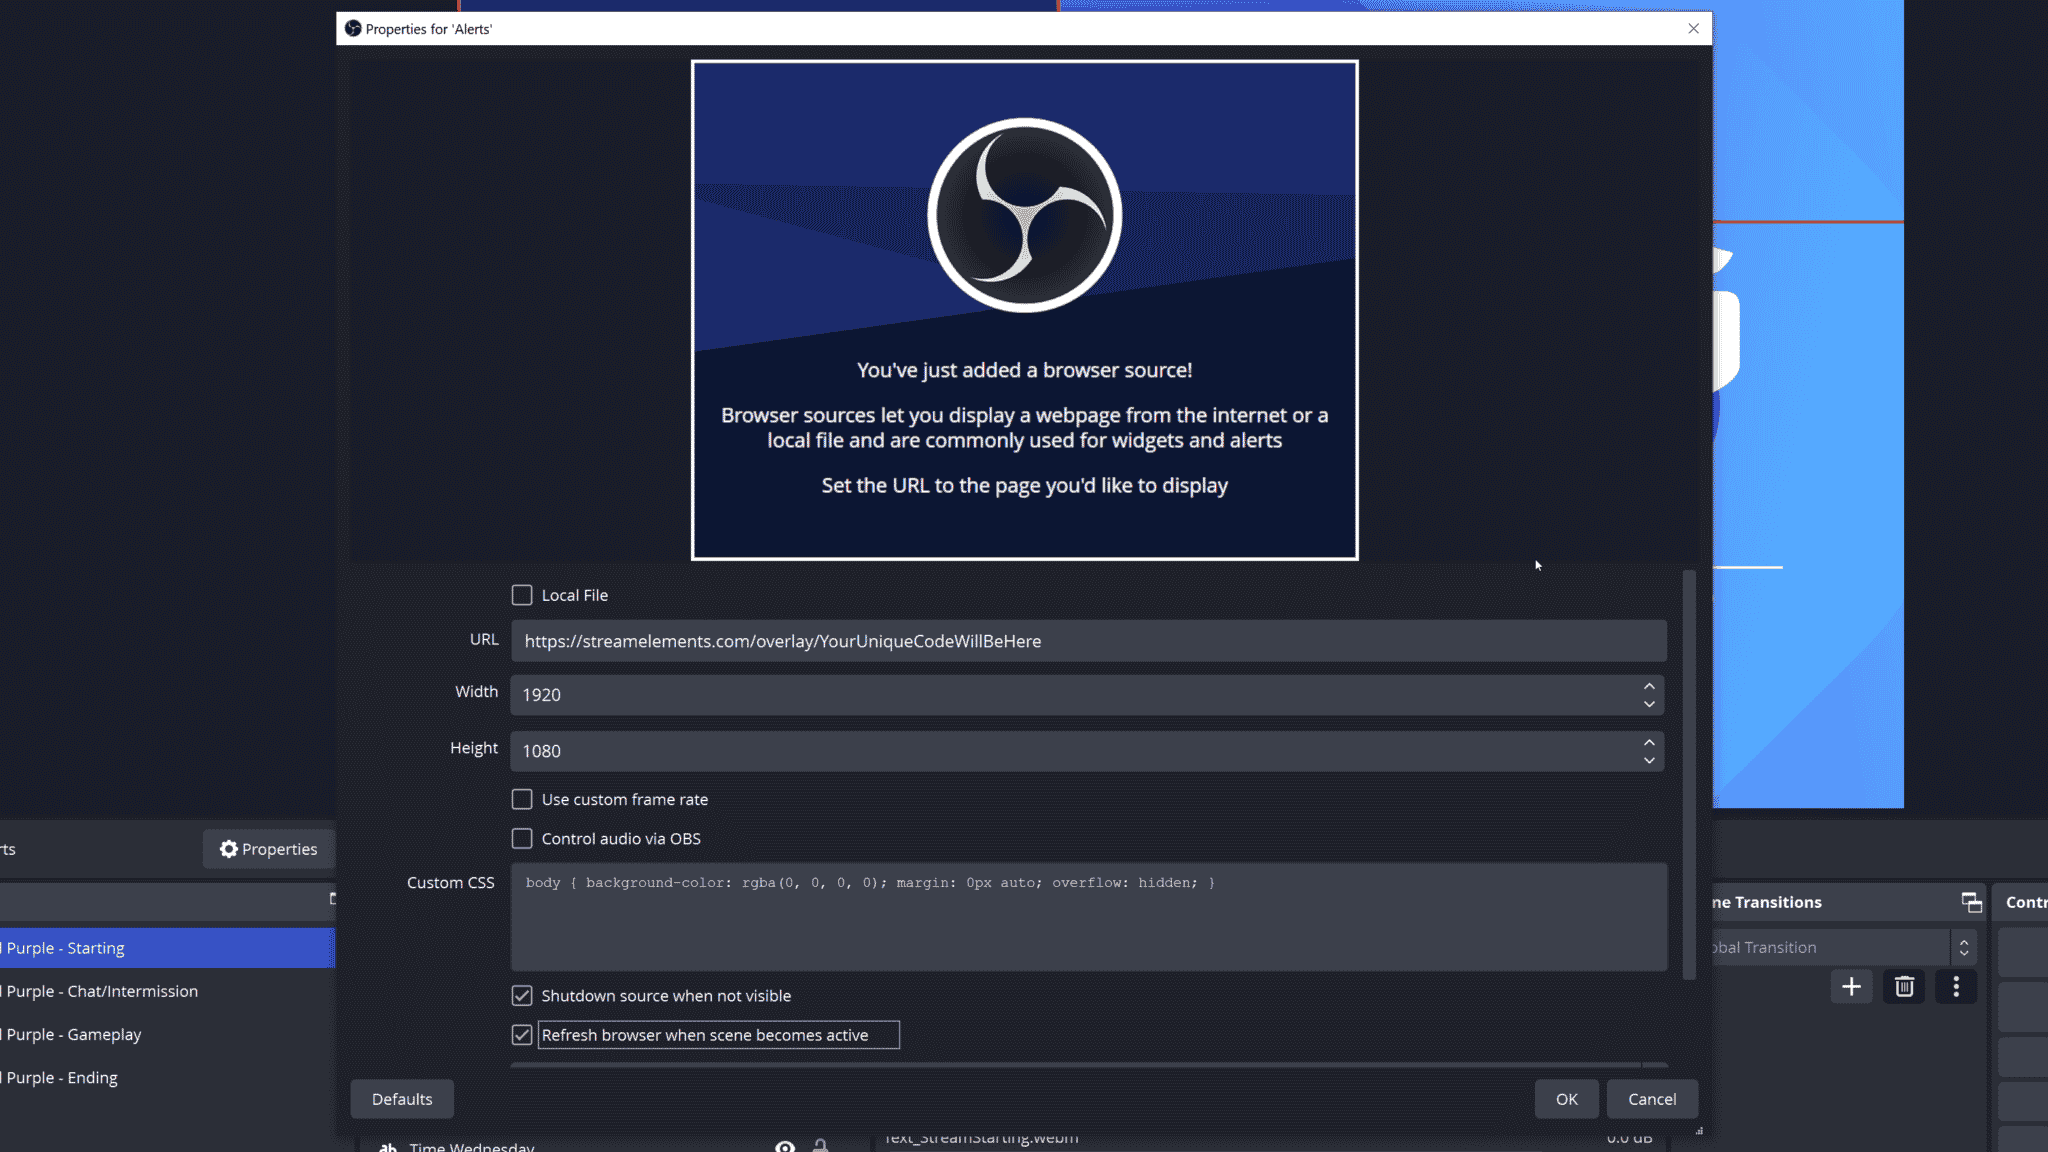
- Copy the browser source URL and head into OBS Studio, select the scene where you want the alerts to show, add a
Browser Source, and paste in theURL. - Make sure the width and height match the canvas in StreamElements, then test some more actions to verify that everything is showing correctly in OBS.
Step 4: Moving Donations to StreamElements
If you used Streamlabs to accept tips or donations on your stream, you can again move this functionality over to StreamElements.
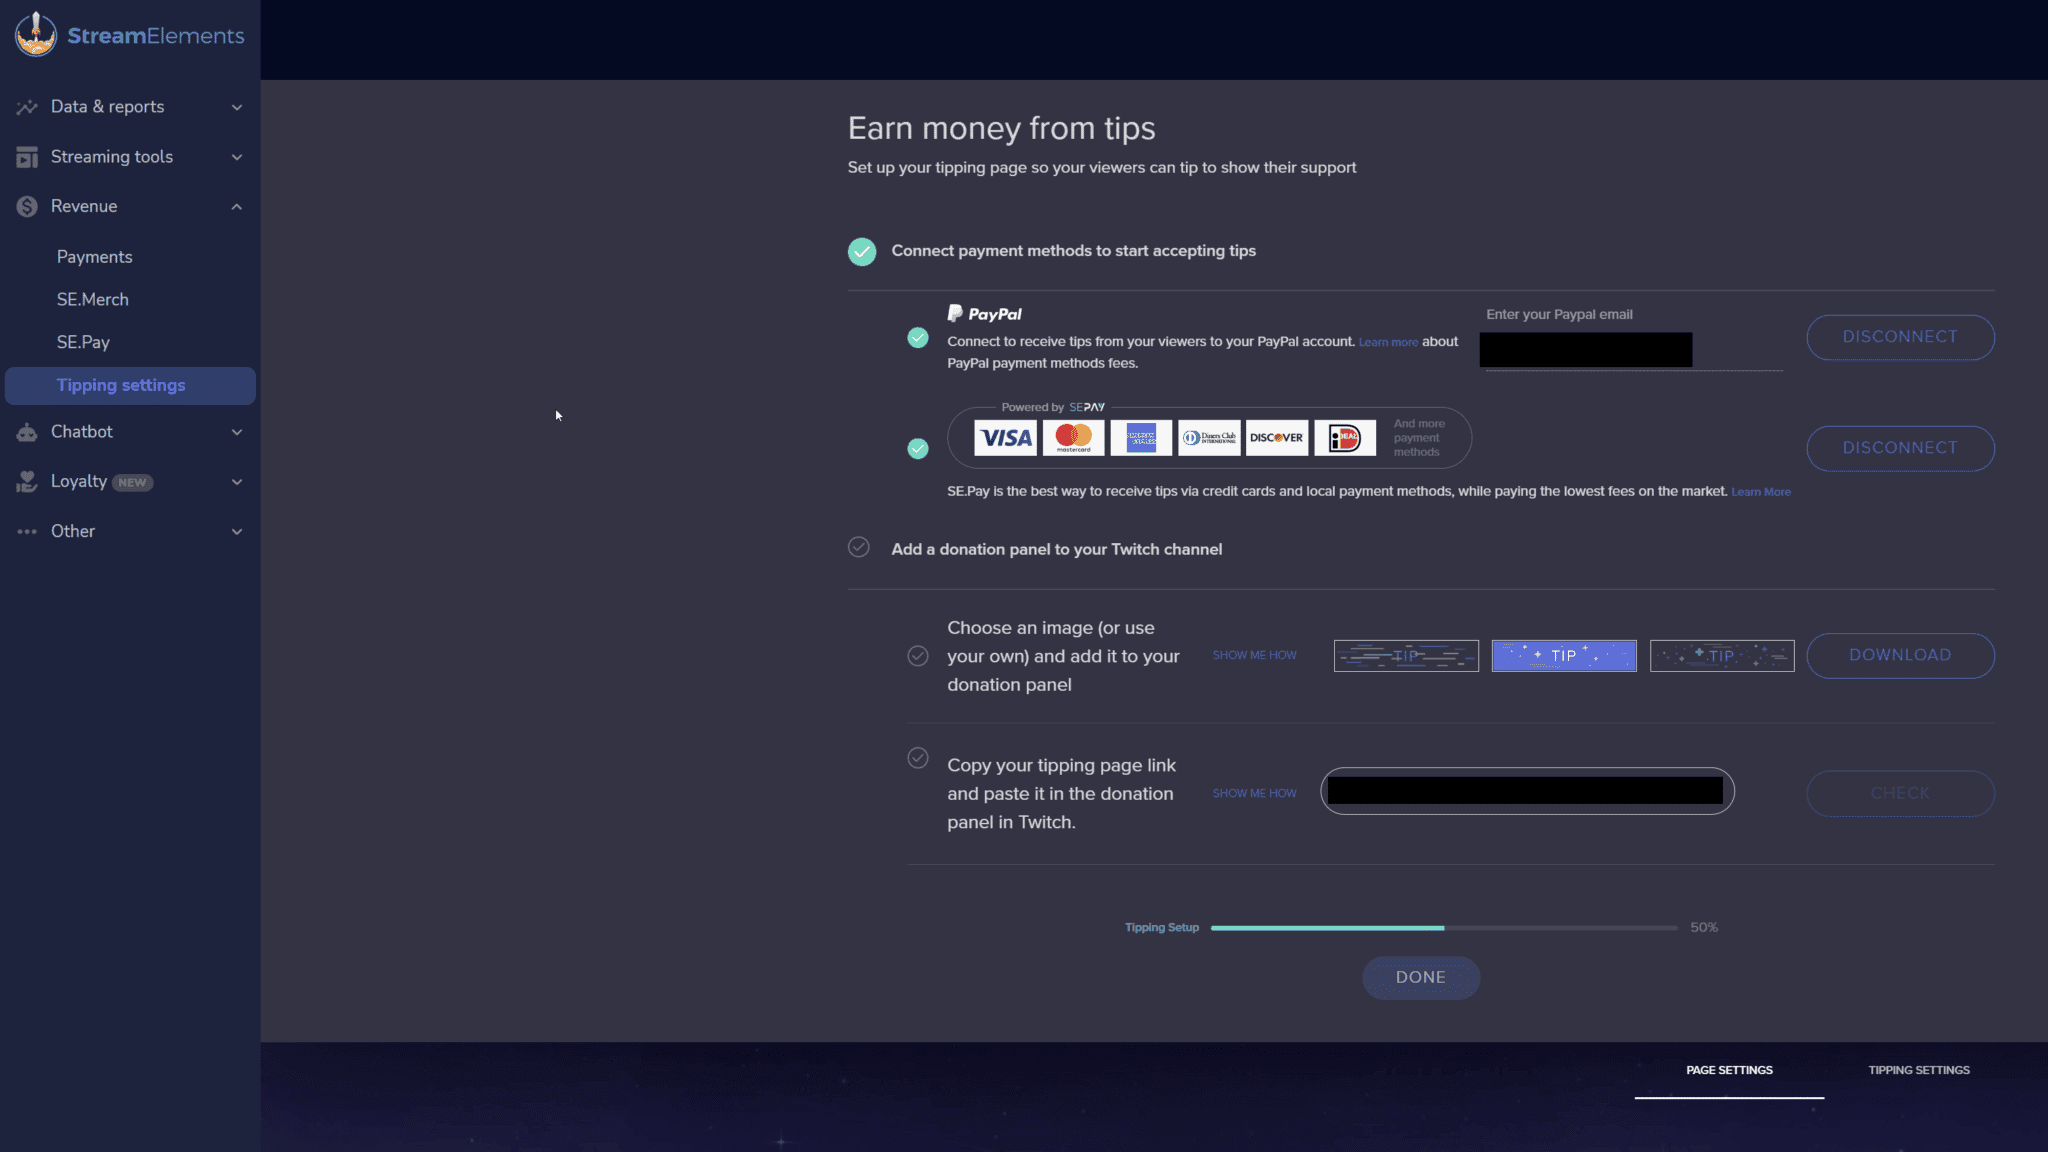
- In StreamElements (opens in a new tab), go to your
Tipping Settingsin theRevenuetab. - Customize the page design, tipping settings, payment providers, currency, minimum, and maximum amounts, tip message or TTS filtering, etc.
- Once you’re done customizing, update any Twitch panels or links with your new URL. This will ensure that viewers are directed to your donation page on StreamElements.
Step 5: Moving Chat Bot to StreamElements
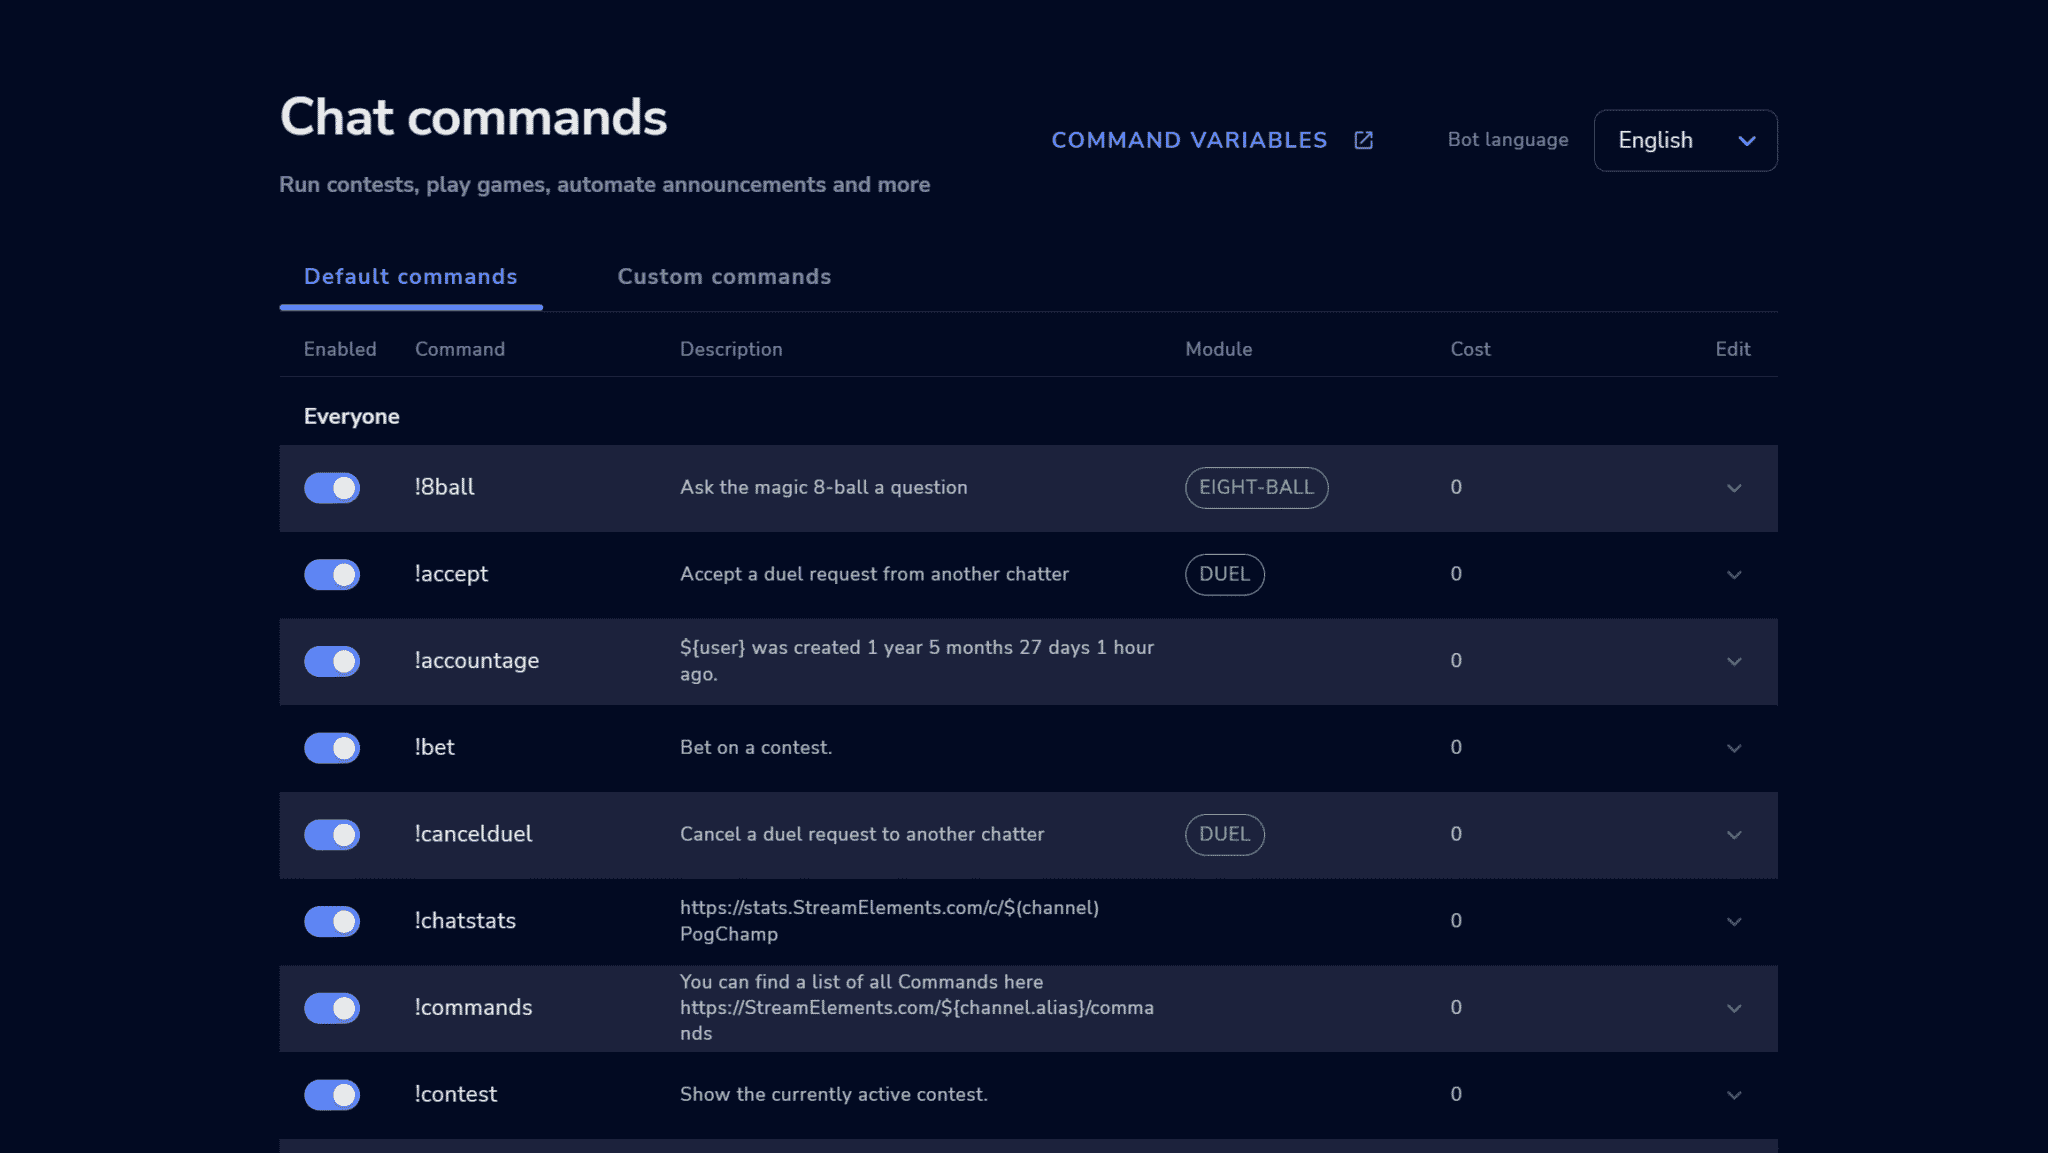
StreamElements offers a chatbot with custom commands, timers, smart modules, and spam filters, making it a viable replacement for Streamlabs Cloudbot (opens in a new tab).
Unfortunately, there’s no easy way to import commands from Cloudbot. If you have many custom commands, the process may be time-consuming. However, StreamElements has several default commands that you can enable in one click.
Alternatively, you can use other chatbots such as Nightbot (opens in a new tab), Moobot (opens in a new tab), or Fossabot (opens in a new tab), depending on your preference.
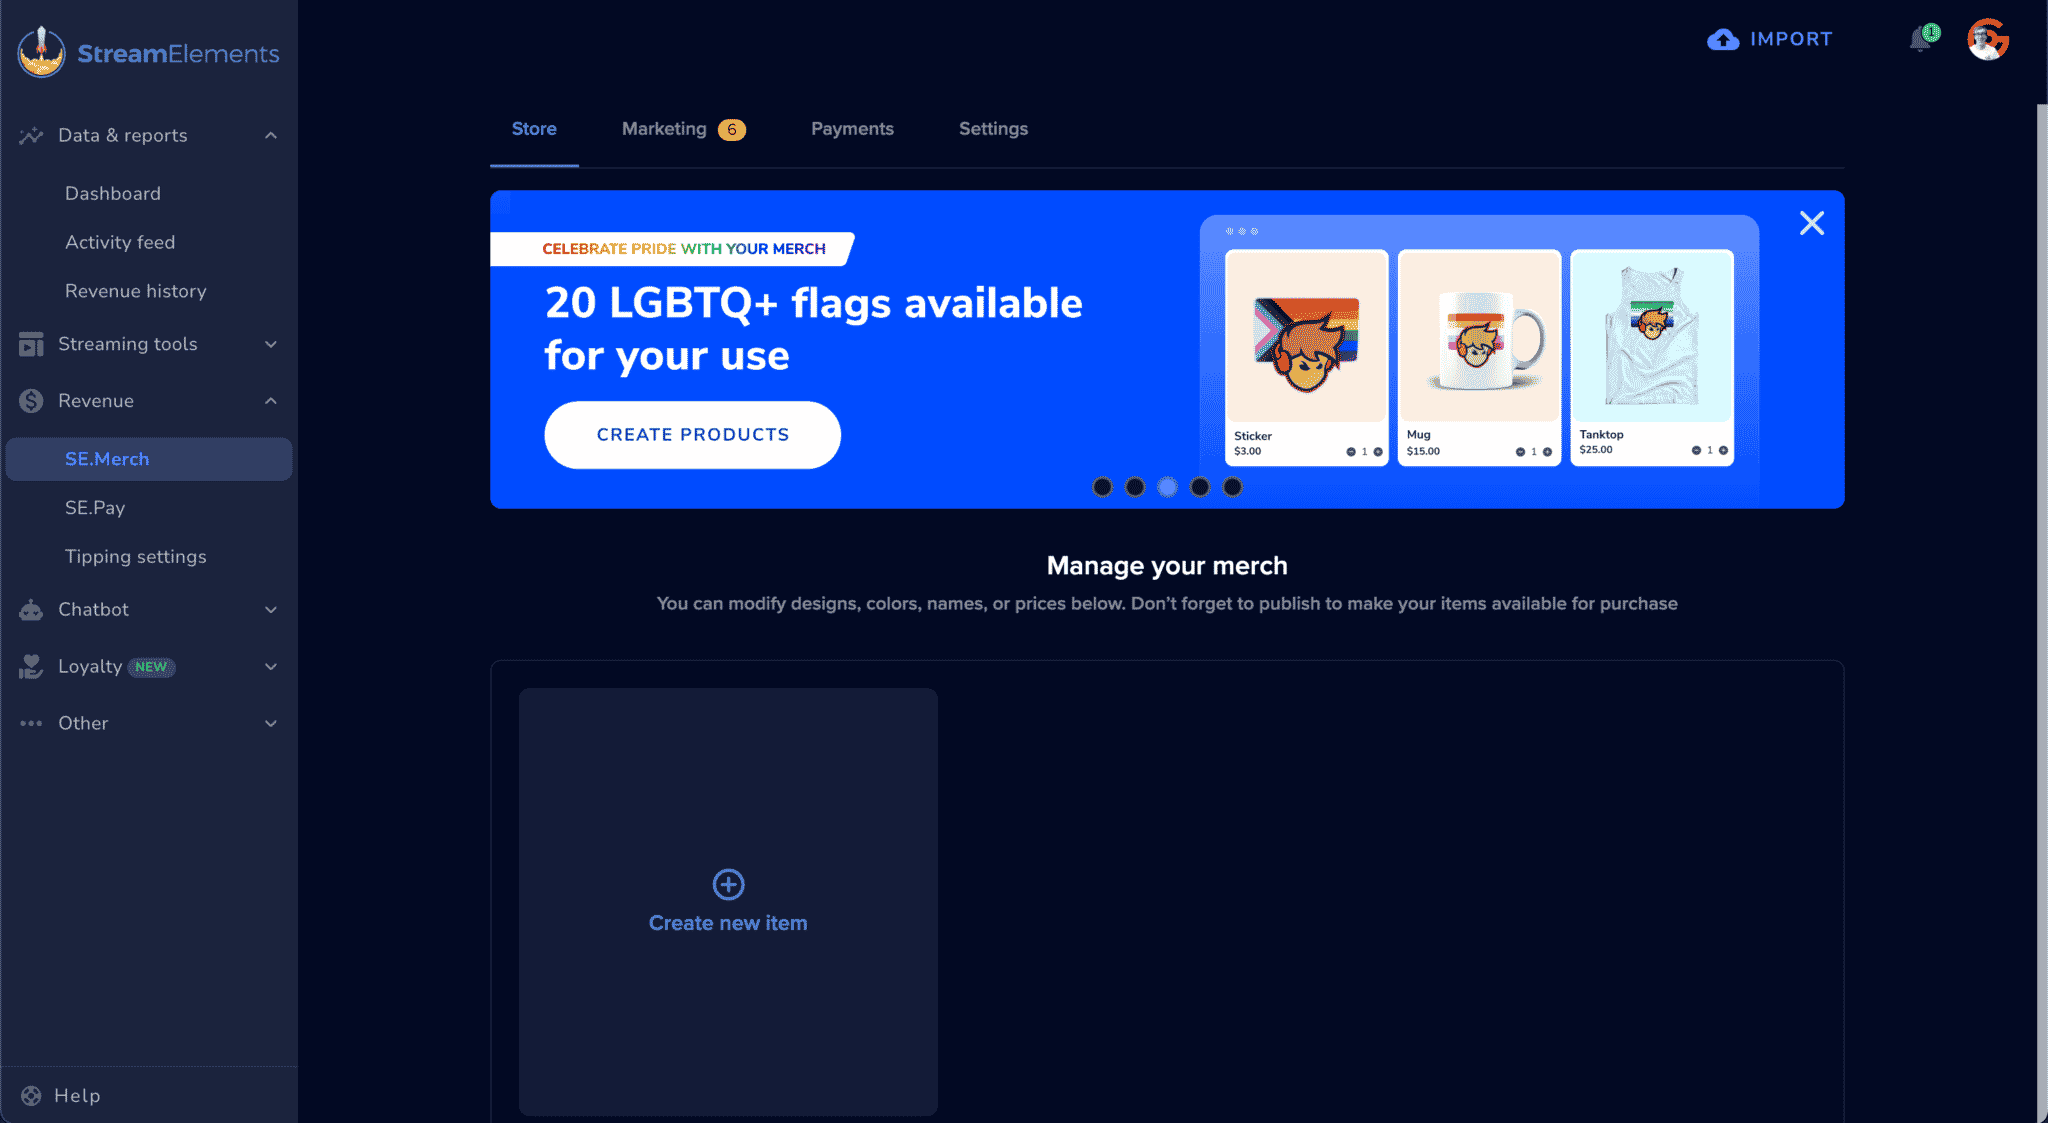
Step 6: Moving Merch to StreamElements
If you’d like to switch your merch store provider from Streamlabs, StreamElements offers nearly the same service. However, you’ll need to recreate your designs and update your links with the new store link.
Alternatively, you can explore other merch store providers such as DesignByHumans (opens in a new tab), Teespring (opens in a new tab), Spreadshirt (opens in a new tab), or others.
Summary
While Streamlabs has been a popular streaming tool for a long time, recent events have shown that many streamers are no longer comfortable using it as their streaming software or alerts provider.
Moving to alternative platforms like OBS Studio and StreamElements can offer numerous benefits, including greater customizability, better reliability, and more control over your streaming experience.
With OBS Studio, you can fully customize your layout and take advantage of its features like docked chat and activity feeds. StreamElements provides a simple and effective way to process tips and donations, and its chatbot can improve your stream’s engagement.
In summary, the decision to switch from Streamlabs to alternatives like OBS Studio and StreamElements ultimately depends on personal preference. With the information provided in this guide, you now hopefully have the necessary knowledge to make the change if you wish to!
Video Guide
As with all of our guides, below we have included a full video tutorial if that is your preferred method of learning.