Maximize Your Reach on Twitch with Live Captions
Boost your Twitch reach significantly! Learn how enabling Twitch’s built-in live captions can make your content accessible to more viewers, just like on YouTube.
Imagine boosting the reach of your Twitch livestreams by 25%. Sounds enticing, doesn’t it? According to data from our YouTube channel (opens in a new tab), almost one in four viewers enable closed captions.
Did you know that Twitch, like YouTube, provides built-in captions? With a single click, viewers can enable real-time transcriptions of your livestreams or VODs, irrespective of whether they are watching on desktop or mobile.
This feature can be beneficial for a variety of reasons. Maybe English isn’t the viewer’s first language, they have hearing impairments, or perhaps they’re in an environment where audio isn’t an option.
By following this guide, you’ll learn how to create a more inclusive, accessible, and engaging livestream by enabling the option of live captions for your viewers.
The best part? You don’t need any additional Twitch extensions or the inconvenience of visiting a separate website each time you stream. You can set it up for free using OBS.
Installing the Closed Captions OBS Plugin
To begin setting up live captions in OBS, ensure that OBS is closed if it is currently running. Download the latest version of the Closed Captions Plugin (opens in a new tab) suitable for your operating system from the releases section.
Once the zip file is downloaded, you need to extract its contents. Inside, you will find a folder named obs-plugins. Navigate to your OBS installation folder, which is typically located at C:\Program Files\obs-studio\.
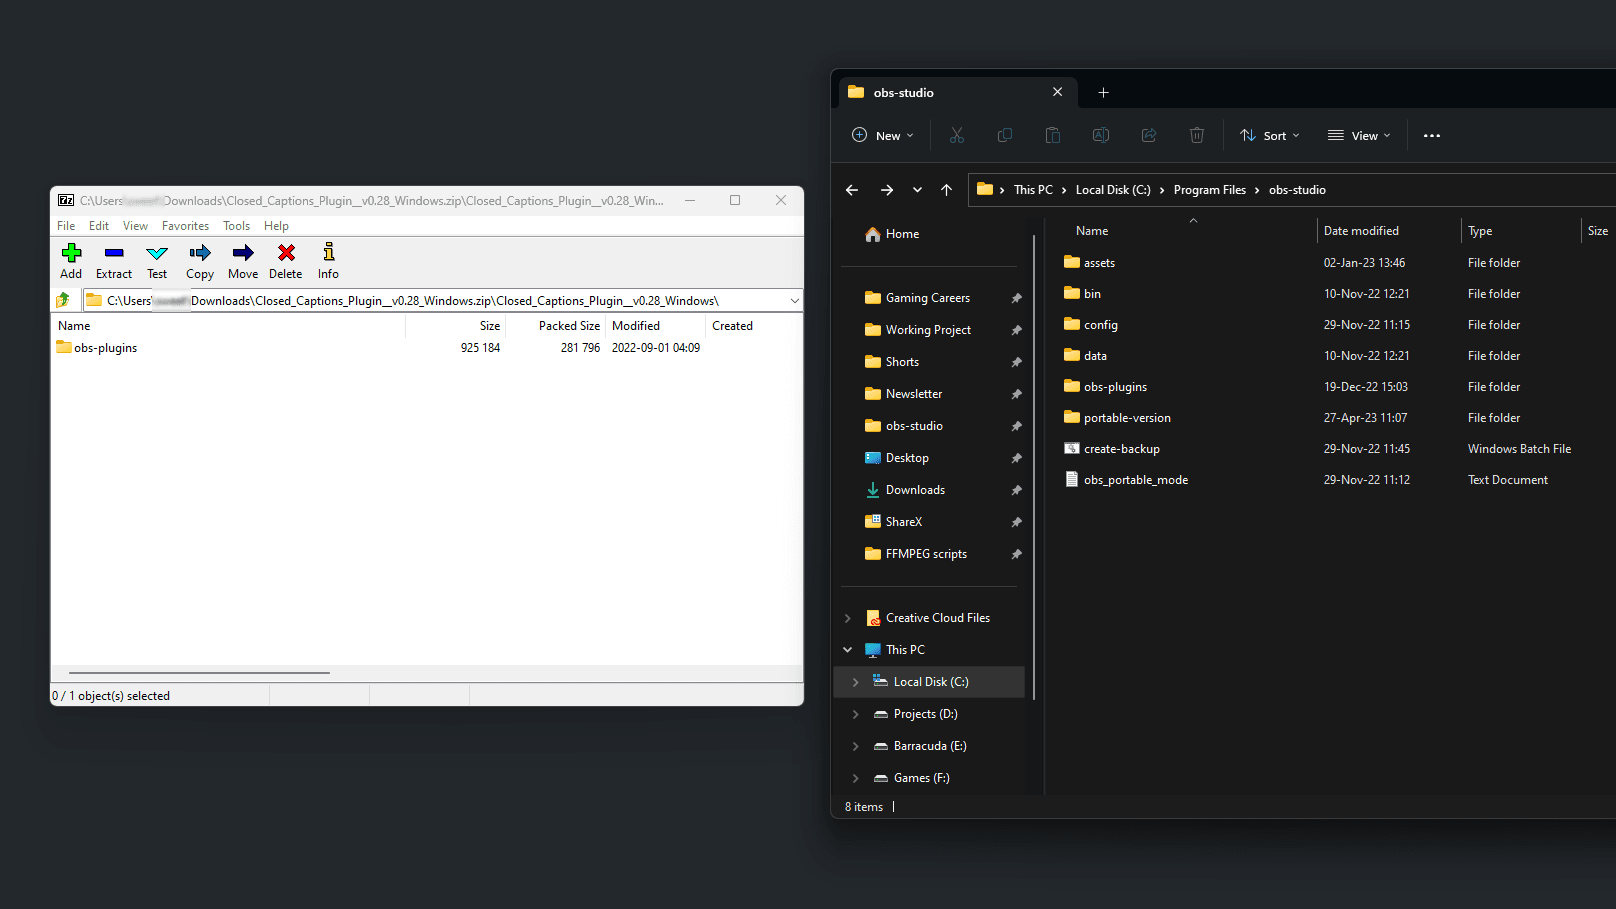
Next, copy and paste the obs-plugins folder into your main OBS installation folder. This should already contain obs-plugins, bin, and data folders. Windows will ask you to confirm to copy and replace files.
Now you’re ready to start OBS. You should see a Cloud Closed Captions option at the bottom of the Tools menu.

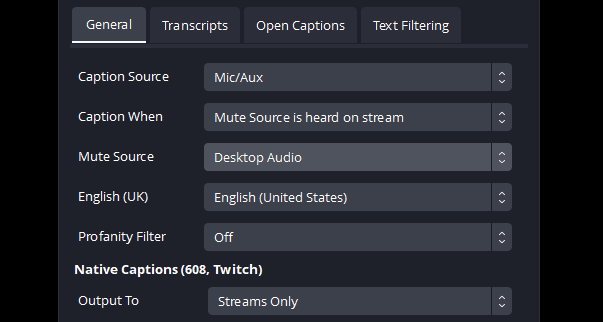
Click on Settings in the new Captions Preview window and select your audio source for captioning under Caption Source. For the best captioning results, select the OBS audio source that is just your microphone, and no other audio sources.
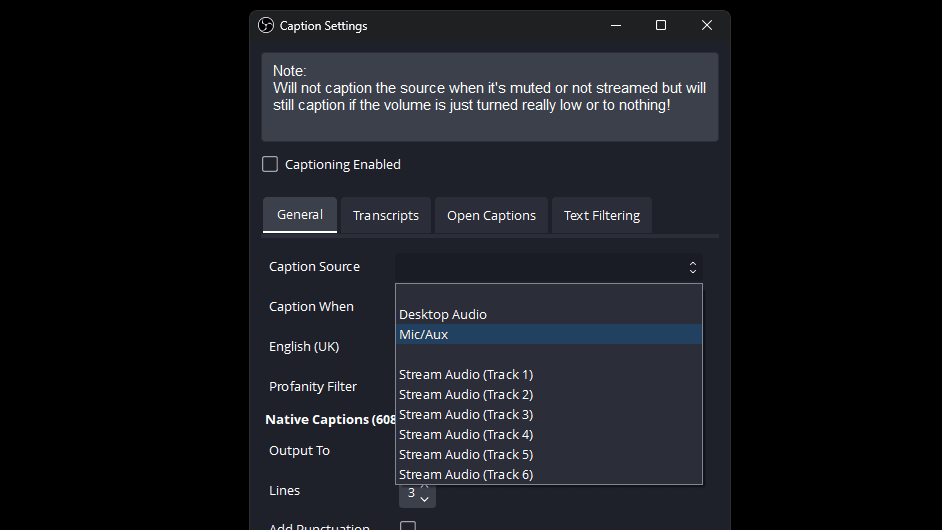
If you’re using an interface like the GoXLR (opens in a new tab) or a Stream Deck + with Wave Link which mixes all your audio sources together into one stream mix, you’ll need to set the Caption Source to your microphone-only source. This ensures that the caption plugin isn’t trying to pull your voice out from a full stream mix with game sound, music, and teammates, and instead is only receiving the feed from your microphone.
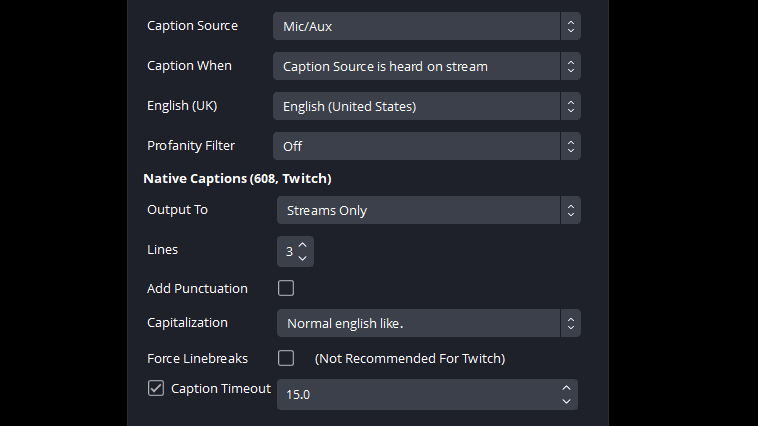
Next, look at the Caption When option. This allows you to customize when the plugin should be making captions. The default option of caption when Caption Source is heard on stream is likely what you’ll want to stick with. This means that if you mute your microphone on stream, it will stop captioning until you unmute.

This is a significant advantage over using a website to write captions for you, as those would keep captioning even when you mute your microphone, which could potentially leak unwanted info to your audience!
Set your language to match the language you’ll be speaking on stream and choose whether you want to enable the Profanity Filter.
You also get the option to determine where you want the captions to go. This could be just for your streams, or for local recordings too – a handy feature if you plan to caption videos on YouTube, Instagram, or TikTok later.
Leave the Lines setting on 3 and Force linebreaks unchecked to avoid issues with how Twitch displays the captions. All other settings can be left at their defaults.
There are plenty of additional functionalities in the other tabs. If you want to for example save your transcripts in .srt files or hard-bake the captions into your stream as a text source.
You can even set up some text replacements if you notice a certain word you say that keeps getting transcribed incorrectly. But for now, let’s focus on getting the basic setup right.
Click Save and then enable the live captions by checking the Captioning Enabled box to test the captioning before going live.
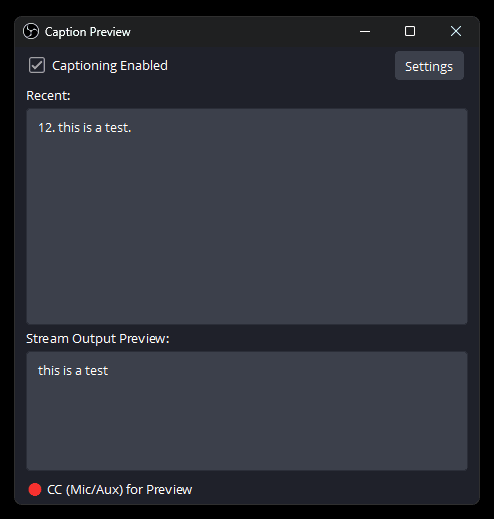
The connection might take a couple of seconds to establish and start working. Once it’s connected, it’ll continue outputting what you’re saying into the preview window. This plugin uses Google’s Speech-To-Text Cloud API, which is the same service that YouTube uses for auto-generated captions. It performs well for most major languages and common words but may struggle with technical terms from games, like champion names, for example.
As you will notice, the transcription is almost instantaneous, with only about a half-second delay. This makes the experience ideal for viewers who want to watch your stream with captions enabled.
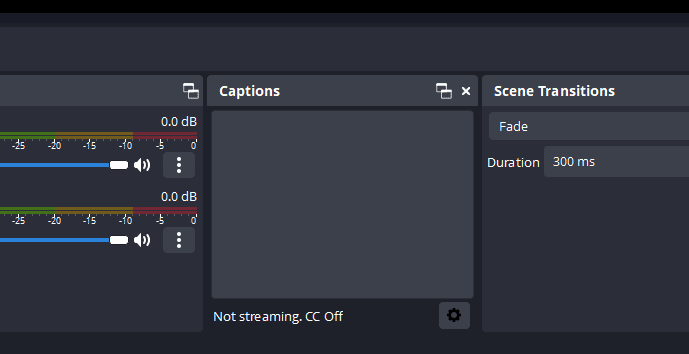
Lastly, there is a dock view that you can open to ensure that your captions are working properly while you are live. If it’s not already showing, you can enable it in Docks → Captions. You can position this dock wherever you want in your OBS window.
How Viewers Enable Captions
Now that you’ve set up the streamer side of things, you might be wondering how your viewers can enable these live captions. It’s a simple process that your viewers can follow the next time you go live.
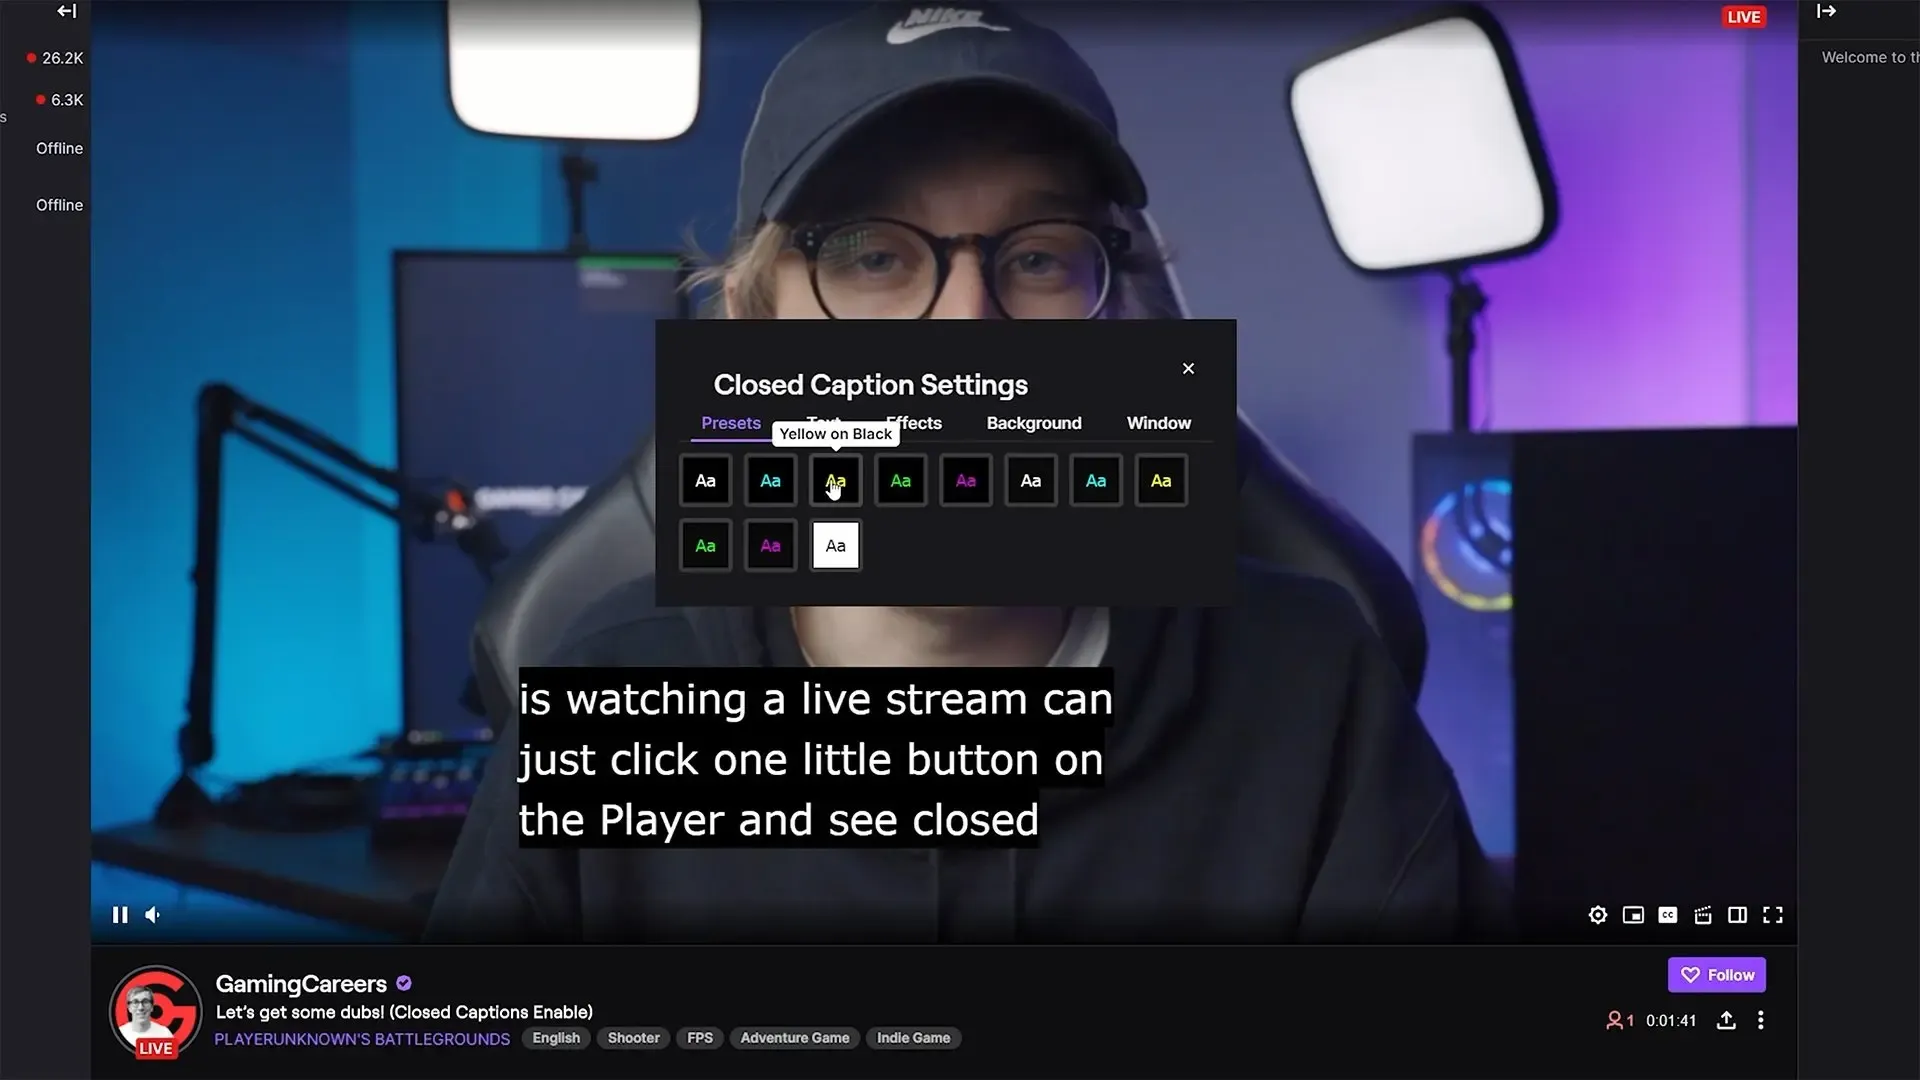
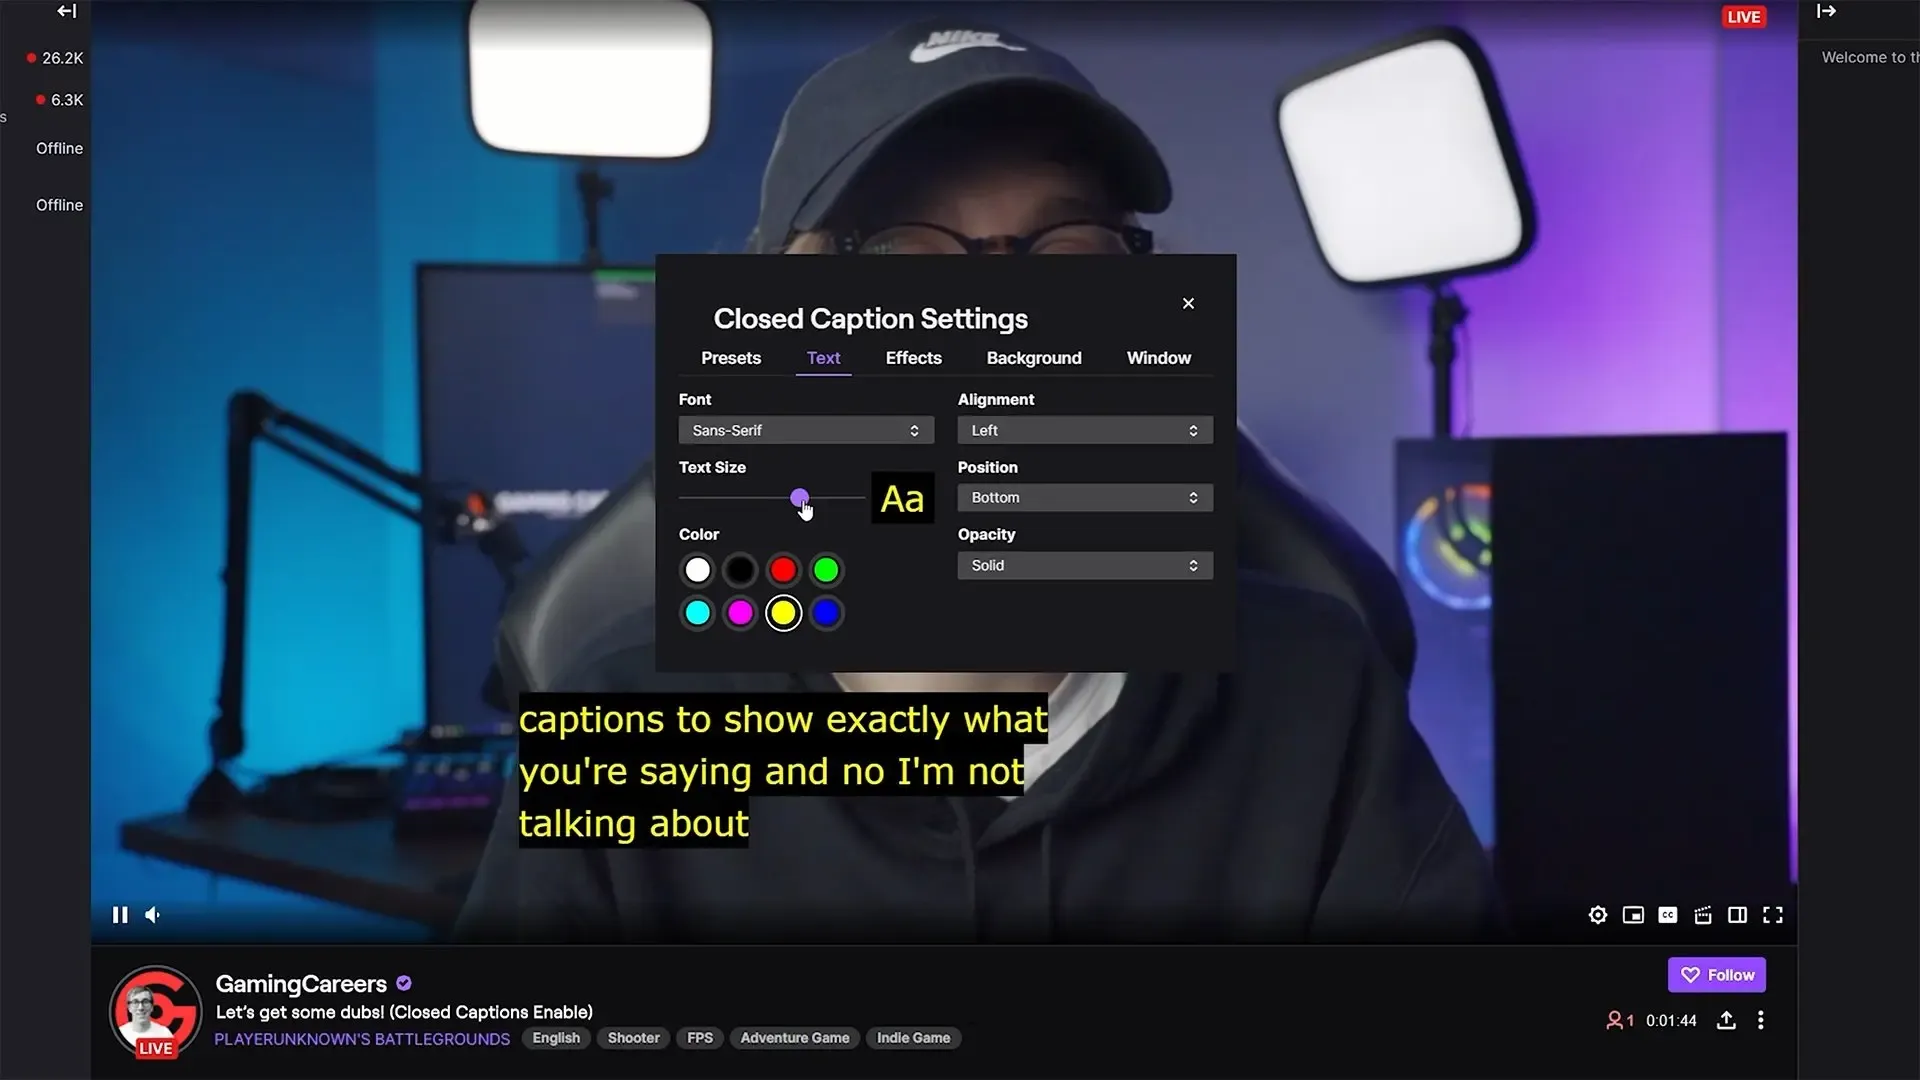
Your viewers will notice a small CC button on the Twitch player. By clicking this, they can enable the captions. But that’s not all; viewers also have complete control over the appearance of the captions on their end. By opening the Closed Captions Options, they can customize their viewing experience to their liking.
Within these options, viewers can modify the text and background colors using presets. For those who want a more personalized experience, they can delve deeper into the options and adjust the font, text size, color, alignment, position, and opacity of the captions, as well as some text effects and background customization. This level of control ensures that each viewer can tailor the captions to their specific needs and preferences.
Also, the captions aren’t just for your stream while you are live, they will also be available for users watching your Twitch VODs after your stream ends, further enhancing the accessibility of your content.
To help your viewers get the most out of your streams, I’d recommend setting up a chat command or timer in your chat that explains how to enable or disable the captions. By educating your audience on how to use these features, you’re ensuring they have the best possible experience while watching your streams.
Captioning for Dual-PC Setups
If you’re running a dual PC setup with a separate streaming PC, you’re likely getting all of your audio mixed together into one source. This combines your microphone, game, team chat, and other sounds through a device like the GoXLR or a Mixer of some sort.
In such a setup, you need to tweak your configuration slightly to ensure optimal use of the captioning feature. Here’s what you need to do:
- Create a new
Audio Input Capturesource in OBS, using the device that’s only the microphone. You could name this sourceMicrophone onlyfor ease of identification. Ensure you mute this source to prevent your stream from hearing the microphone twice. - Head over to the caption settings. Set the
Caption Sourceto theMicrophone onlyOBS source that you’ve just created and muted. This ensures that the plugin uses clean microphone audio for captioning. - Set
Caption WhentoMute Source is heard on stream. This setting ensures that the captions are generated only when a selected mute source is heard on stream, providing an additional layer of safety. - Set
Mute Sourceto your mixed audio OBS source that the stream hears. This way, the captions are generated from the clean microphone audio, but they are only active when the mixed audio source for the stream is unmuted in OBS. When the mixed source for the stream is muted in OBS, the captions also get muted.
Summary
Incorporating live captions into your Twitch streams is an effective way to broaden your audience reach, enhance viewer engagement, and make your content more accessible.
By leveraging a simple OBS plugin, streamers can provide real-time transcriptions without the need for additional extensions or third-party websites. For viewers, enabling captions is as simple as clicking the CC button that’s already available on the Twitch player.
Remember, educating your viewers about these features can help them get the most out of your streams. So, whether you’re a streamer looking to expand your reach or a viewer wanting to catch every word of your favorite streamer’s commentary, live captions are a game-changer.
Video Guide
As with all of our guides, below we have included a full video tutorial if that is your preferred method of learning.